
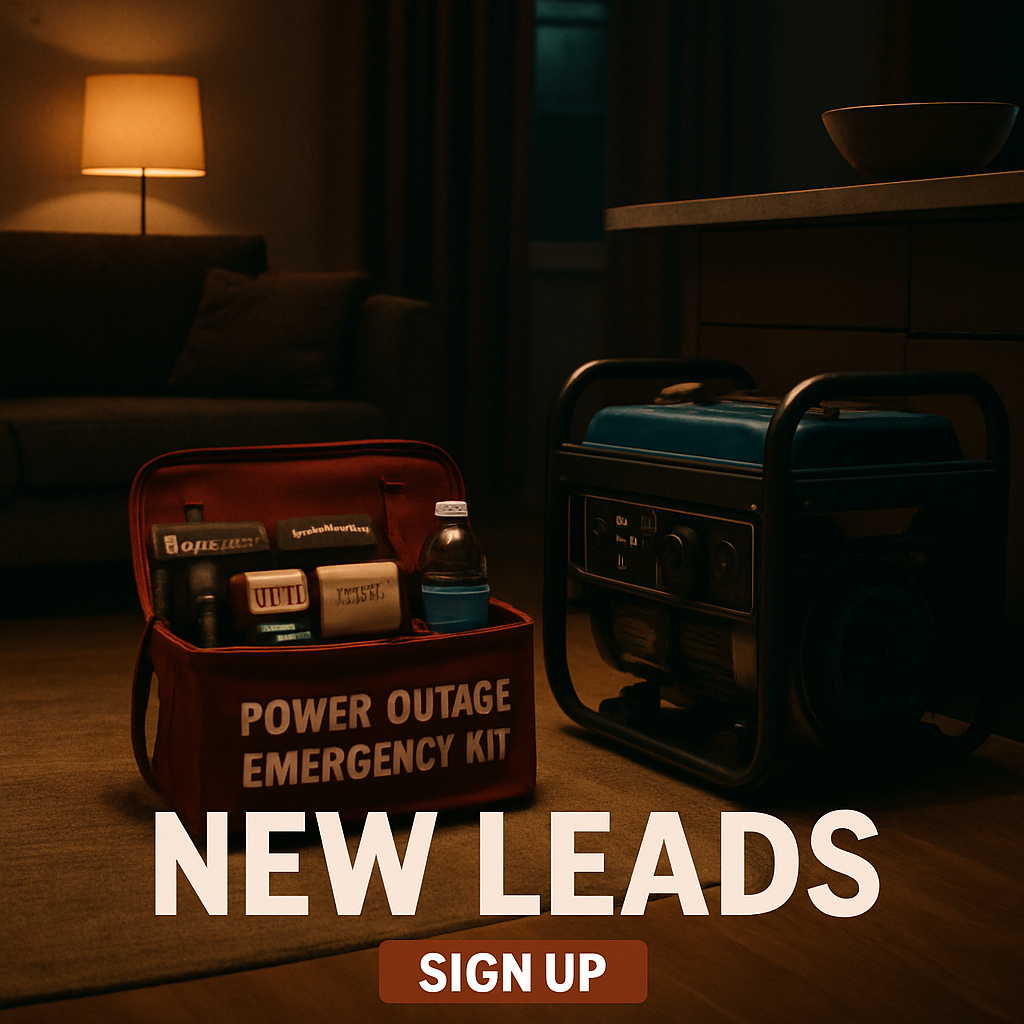
Power Outage Emergency Kit Checklist: Essential Items to Stay Safe

Ever been in the middle of a storm, watching the lights flicker off and feeling that knot of panic in your stomach?
If the power drops while you’re cooking dinner or trying to keep the kids entertained, it’s easy to see how quickly a simple inconvenience turns into a safety issue. That’s why having a solid power outage emergency kit checklist is more than a nice‑to‑have—it’s the difference between staying comfortable and scrambling for candles, cold food, and a way to charge your phone.
Our go‑to checklist breaks the kit into four buckets: power sources, lighting, food & water, and comfort & safety. For power, think beyond a single flashlight—consider a portable generator or an inverter unit that can keep a fridge running. Lighting means more than a single LED lantern; a stack of battery‑powered bulbs gives you flexibility in every room. Food and water aren’t just about having snacks; you’ll want a supply of non‑perishable meals and a couple of gallons of purified water per person. Finally, comfort and safety cover everything from a first‑aid kit to a blanket and even a whistle for pets.
Here’s how to turn that list into a ready‑to‑grab bag: 1️⃣ Write down each item and check it off as you buy or locate it. 2️⃣ Store everything in a waterproof tote that fits under your kitchen island or in the garage. 3️⃣ Test your power source monthly—run the generator for five minutes or switch on each LED to ensure batteries hold charge. 4️⃣ Rotate food every six months and replace water containers annually. 5️⃣ Keep a printed copy of the checklist on the fridge so the whole family knows what’s inside.
When you’re deciding how big a generator you need, our own guide on How to Use a Generator Size Calculator for Home Power Planning walks you through the math so you don’t overpay for a unit that sits idle most of the year.
Take a few minutes tonight to pull out the tote, grab the items you already have, and add the missing pieces to your shopping list. A prepared kit not only eases the stress of an outage—it also gives you peace of mind that you can keep the lights on for your loved ones, even when the grid goes dark.
TL;DR
A power outage emergency kit checklist bundles a portable generator, LED lights, non‑perishable food, water, and pet gear so you stay safe when the grid fails.
Use our quick three‑step routine—pack, store, test monthly, rotate supplies, and post the list on the fridge—to keep everything ready and confidence high always.
Step 1: Assess Your Household’s Power Needs
Ever felt that gut‑tightening jolt when the lights flicker off and the fridge hum dies? You’re not alone – it’s that instant panic that something important is about to go dark. Before you rush out to buy a generator, take a minute to actually figure out what you really need to keep the house running.
First, make a quick inventory of every appliance or device you can’t live without during an outage. Grab a pen, open a new note on your phone, and list things like the refrigerator, a sump pump, medical equipment, phones, and maybe that home office laptop. Anything that would cause a real problem if it stopped? Write it down.
Calculate the wattage
Next, look up the wattage for each item. Most modern appliances have a label on the back or inside the door – it’ll say something like “120 V 800 W.” If you can’t find it, a quick Google search of the model name will do. Add up the starting (surge) watts for motor‑driven devices and the running watts for lights and electronics. The total gives you a ballpark figure for the generator size you’ll need.
In our experience, most single‑family homes fall between 3,000 and 7,000 watts for essential loads. If you’re unsure, check out our How to Use a Generator Size Calculator for Home Power Planning guide – it walks you through the math without the headache.
But don’t forget the little things that add up: a few LED bulbs, a phone charger, a radio. Those low‑draw items can be powered by a portable power station, which is quieter and lighter than a full‑size generator. If you’re weighing options, think about the noise level, fuel type, and how long you need to run each load.
Match the power source to your lifestyle
Are you a pet owner who worries about the aquarium pump? A DIY enthusiast with power tools? Or maybe you have a family member on a home‑ventilator? Your answer shapes the type of backup you choose. For heavy‑duty needs, a gasoline‑powered generator might be the only practical solution. For lighter, quieter use, an inverter generator or a portable power station could be enough.
Once you have a rough wattage, compare it to the specs on the units you’re considering. Keep an eye on the “continuous run” rating – that’s the power you can count on for hours, not just the surge you see when you first flip the switch.
And here’s a pro tip: add a 10‑15% safety margin. Generators that run at full capacity nonstop can overheat, so a little headroom keeps everything cool and reliable.
Now that you know how much power you need, it’s time to think about post‑outage cleanup. A power failure often leads to water damage, mold, or even structural issues once the electricity returns. For professional help, check out Disaster Response By Ryan, a trusted service that can get your home back to normal fast.
While you’re at it, consider how you’ll keep the whole family safe and reachable when the lights go out. A real‑time location app can give you peace of mind, especially if kids or older relatives are home alone. Learn more about a handy solution at Guardian.
Finally, write down your final wattage total on a sticky note and tape it to the inside of the generator’s storage tote. When you pull the tote out for the next emergency drill, you’ll instantly know if the unit you bought still meets your needs or if it’s time to upgrade.
Step 2: Choose Reliable Lighting Solutions
Picture this: the power’s gone, the house is quiet, and you’re fumbling for a light switch that won’t work. That moment of sudden darkness is exactly why we put lighting front‑and‑center in the power outage emergency kit checklist. You deserve a reliable glow that won’t leave you guessing.
It isn’t just about avoiding a stumble in the hallway. Proper lighting keeps food safe, lets you read medication labels, and reduces the stress of trying to navigate a home that feels like a maze. When the lights are out, every room becomes a potential hazard – especially if you have kids, seniors, or pets that need extra reassurance.
Start by asking yourself: which rooms do you need light in, and for how long? The kitchen, bathroom, and a bedside lamp are usually non‑negotiable. Then think about the tasks – cooking, checking the fridge, or simply reading a book to keep the kids calm. Write those needs down, then match each to a lighting solution that can run for at least 8‑12 hours.
Types of portable lighting you can trust
• LED lanterns – the workhorse of any outage kit. They’re bright (500‑800 lumens), have long‑lasting batteries, and often include a dim‑mode for conserving power.
• Headlamps – hands‑free, lightweight, and perfect for crawling under cabinets or checking the fuse box.
• Battery‑powered LED bulbs – screw into standard fixtures, so you don’t have to rearrange furniture. Look for models with a built‑in rechargeable pack.
• Solar‑charged lights – great for a backup if you’ve got a sunny window; they store energy during the day and glow at night without any fuel.
How to evaluate reliability
First, check the lumen rating. Anything under 300 lumens will feel like a candle – fine for a night‑stand, but not for a kitchen. Next, look at battery life: a good lantern should promise at least 10 hours on a single charge at its highest setting. Waterproof or IP‑rated casings are a must if you live in a rainy climate; a splash‑proof design means you can safely store it in a waterproof tote.
Durability matters, too. A clunky plastic body can crack when you drop it in a hurry. Choose units with impact‑resistant housing and a simple one‑button operation – you don’t want to fumble with menus when the power’s already gone.
So, what should you do next? Grab a few of these options and line them up on your kitchen counter. Compare the weight, the feel of the switch, and the brightness. In our experience, a combination of a high‑lumens lantern, a headlamp for close‑up tasks, and a couple of rechargeable bulbs covers almost every scenario.
Real‑world example
Imagine a family of four in a cold snap. The fridge needs a quick glance, the kids want a story, and the bathroom light is essential for a safe night‑time routine. A 750‑lumen LED lantern (runs 12 hrs), two headlamps (8 hrs each), and two rechargeable bulbs (10 hrs) will keep everyone comfortable without draining the battery bank. Add a small solar lantern for an extra safety net, and you’ve got redundancy built in.
According to Energy Harbor’s Power Outage Emergency Kit Checklist guide, most outages last a few minutes, but severe events can stretch for days. Planning for the worst‑case scenario means choosing lighting that can sustain you well beyond the average interruption.
Building your lighting kit
1️⃣ List the rooms and tasks you identified.
2️⃣ Match each to a lighting type (lantern, headlamp, bulb, solar).
3️⃣ Check the battery specs – aim for at least a 25 % safety margin over your estimated usage.
4️⃣ Store everything in a waterproof tote that fits under the kitchen island or in the garage.
5️⃣ Test each piece monthly: turn the lantern on for the full runtime, flip the headlamp on and off, and make sure the rechargeable bulbs hold charge after a week in storage.
Testing is the secret sauce. If a bulb won’t light after a month, replace it before the next storm. And don’t forget to rotate spare AA/AAA batteries every six months – they lose charge even when they sit idle.
After you’ve watched the quick video, you’ll see exactly how to hook a lantern to a portable power station if you need that extra boost. It’s a simple plug‑and‑play step that can double your light time without any extra batteries.
Finally, add a short checklist to the back of your kit:
- LED lantern – fully charged
- Two headlamps – batteries fresh
- Two rechargeable LED bulbs – stored in tote
- Solar lantern – placed in sunny window
- Spare AA/AAA batteries – labeled and rotated
- Waterproof tote – sealed and labeled “Lighting Kit”
When you’ve crossed each box, you can breathe easier knowing you won’t be left in the dark. Light isn’t just a convenience; it’s a core part of staying safe, calm, and in control during any outage.
Step 3: Stock Essential Food and Water Supplies
When the lights go out, the first thing most of us reach for is the pantry. But have you ever actually opened it during an outage and wondered if what’s inside will really keep you fed and hydrated for a full day? That moment of doubt is what we’re trying to erase.
Here’s the mindset: you want a kit that lasts at least seven days, because the longest outages we’ve seen in recent storms have stretched beyond 48 hours. The Florida Department of Health’s emergency kit guide recommends one gallon of water per person per day – that’s 7 gallons for a family of four, plus a little extra for sanitation.
Water: Quantity, Storage, and Rotation
Start by calculating your baseline. Multiply the number of people (including pets) by 7 gallons. If you have a baby or someone on medication, add another gallon per day for their specific needs. Store water in food‑grade 5‑gallon containers with tight‑fit lids. Plastic is fine, but keep them out of direct sunlight to avoid algae growth.
Rotation is key. Mark the purchase date on each container and swap them out every six months. A quick tip: keep a small supply of water purification tablets or a portable UV purifier in your tote – they’re cheap and can turn any tap water safe if you run out of pre‑stored bottles.
Food: Balancing Nutrition, Shelf Life, and Space
Think “ready‑to‑eat” and “no‑cook.” Canned beans, tuna, and chicken are protein powerhouses that last 3‑5 years. Pair them with instant rice, quinoa, or whole‑grain pasta for carbs. Don’t forget high‑energy snacks – protein bars, trail mix, and dried fruit keep morale high and blood sugar stable.
For families with kids, throw in a few comfort items: a jar of peanut butter, some cereal, or even a small box of instant oatmeal. These aren’t just calories; they’re a reminder that you’re still in control.
Now, the logistics: a standard 28‑quart cooler (you can find one in our Portable Power Station vs Generator guide) can hold roughly 12 gallons of water and a decent amount of canned goods if you line it with ice packs. Stack cans vertically – you’ll save space and make it easier to pull out the one you need without toppling the whole shelf.
Special Dietary Needs and Pet Supplies
If anyone in the house has allergies, diabetes, or a gluten intolerance, earmark a separate “diet” box with safe alternatives. The same logic applies to pets: a week’s worth of dry food, a few treats, and a portable water bowl. Don’t overlook pet medication; store it in the same waterproof bag as your human meds.
One real‑world example: a family of four in Tampa kept a 7‑day kit in a rolling tote. When Hurricane Ian knocked out power for nine days, they used their cooler’s ice packs to keep the water cold, boiled water on a camp stove, and survived comfortably on canned soups and rice. The only thing they missed? A small manual can opener – they improvised with a pocketknife, which reminded them to add a dedicated opener to the next iteration.
Actionable Checklist
- Calculate gallons of water needed (people × 7 + extra for pets).
- Buy food‑grade containers; label with “Rotate 6‑mo”.
- Choose non‑perishable foods: canned proteins, grains, high‑energy snacks.
- Pack a manual can opener, water purification tablets, and a portable UV purifier.
- Include specialty items: allergy‑safe foods, pet meals, meds.
- Store everything in a waterproof tote that fits under the kitchen island or in the garage.
- Set a calendar reminder to rotate water and food every six months.
Testing isn’t just for generators. Once a month, open a water container, check the seal, and taste a small bite of a canned item. If the label is faded or the can is dented, replace it immediately.
Finally, remember that food and water are the backbone of any power outage emergency kit checklist. By treating them as a living part of your plan – rotating, testing, and adjusting for special needs – you turn a vague “hope it works” into a confident, actionable strategy.
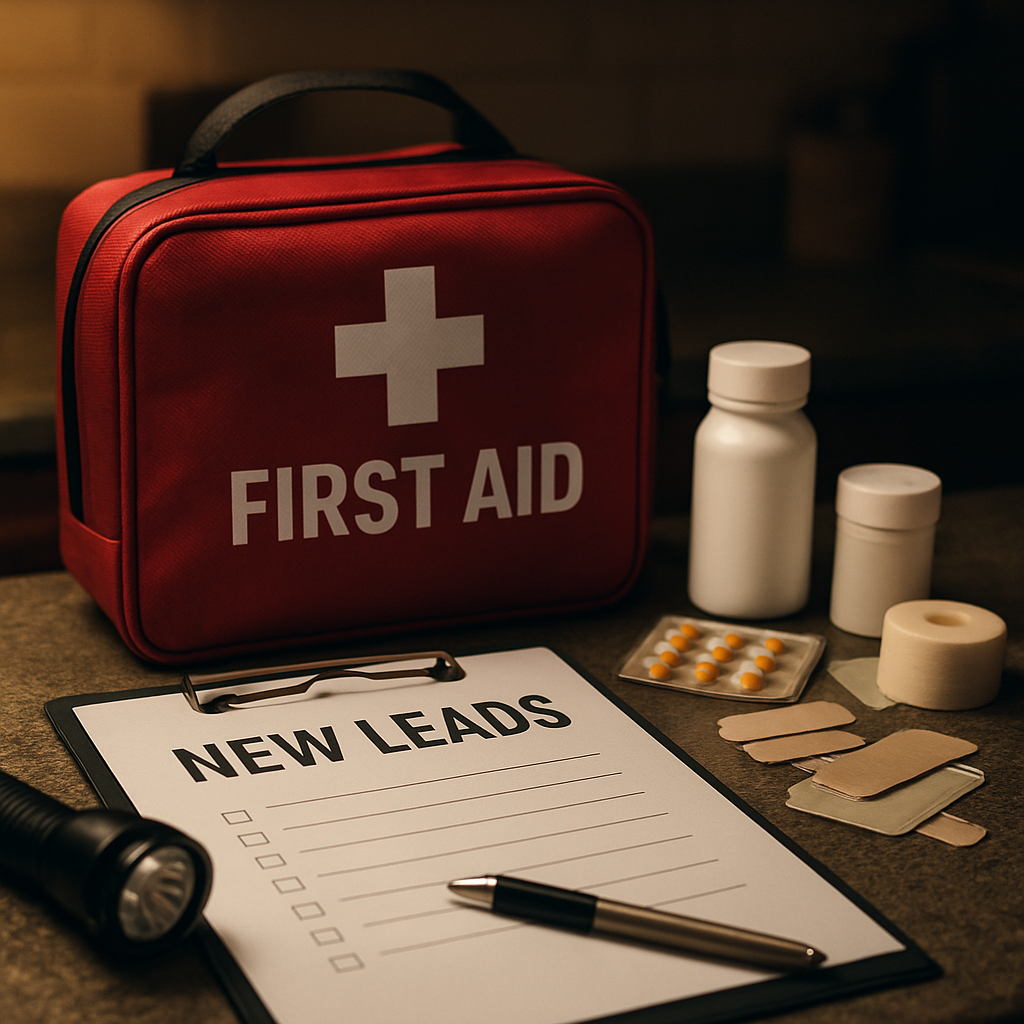
Step 4: Prepare First‑Aid and Health Essentials
Ever felt that knot in your stomach when the lights go out and you wonder if you have anything to treat a cut, a fever, or a sudden allergic reaction? That little flash of worry is exactly why a solid power outage emergency kit checklist has to include a well‑thought‑out health kit.
When the power’s down you lose more than illumination – you lose refrigeration for meds, you lose the hum of a medical‑grade air purifier, and you might be stuck without a quick way to stop a bleed. In those moments, a few well‑chosen items can mean the difference between “I’ll manage” and “I need help now.”
So, how do you build a first‑aid kit that actually works when the grid fails?
1. Gather the core supplies
Start with the basics that cover the most common emergencies. Here’s a quick inventory you can copy‑paste into a notebook or a phone note:
- Adhesive bandages (various sizes) – for small cuts and blisters.
- Sterile gauze pads and roll – to stop bleeding.
- Adhesive tape – to secure gauze.
- Antiseptic wipes or spray – to clean wounds.
- Antibiotic ointment – helps prevent infection.
- Elastic wrap (ACE bandage) – for sprains.
- Disposable gloves (non‑latex) – keep things sanitary.
- Scissors and safety pins – cutting tape or cloth.
- Thermometer (digital, battery‑operated) – monitor fevers.
- Over‑the‑counter pain relievers (acetaminophen or ibuprofen) – for aches, fever, or minor injuries.
- Antihistamine tablets – for allergic reactions.
- Prescription meds in a waterproof container – keep them dry and accessible.
Each of these items is cheap, lightweight, and fits in a small waterproof tote. In our experience, a tote that’s about the size of a large lunchbox is enough for a family of four.
2. Tailor the kit to your household
Now that you have the backbone, think about the people (and pets) you’re protecting. Do you have a child who’s prone to asthma? Add a spacer and a few rescue inhalers. Is someone on blood thinners? Include a quick‑reference card with their medication name and dosage. Got a senior with a chronic condition? Pack a spare supply of their daily pills and a list of emergency contacts.
Pet owners often forget their furry friends. A small zip‑pouch with pet‑specific meds, a few extra doses of flea/tick prevention, and a compact pet first‑aid guide can be a lifesaver. You don’t need a whole veterinary kit – just the basics to bridge the gap until you can get to a clinic.
Imagine a storm hits while your teenager is playing soccer in the backyard and twists an ankle. With an elastic wrap and a pair of pain relievers already in the kit, you can treat the sprain, keep them comfortable, and avoid a trip to the ER when the nearest clinic is also without power.
3. Store, rotate, and test
Everything looks great on paper until you can’t find it in the dark. Store the kit in the same waterproof tote you use for food and lighting, and keep that tote under the kitchen island or in a garage shelf that’s easy to reach. Label the tote “Health Essentials” with a bold marker so you don’t have to search for it.
Expiration dates are the silent culprits in first‑aid kits. Set a calendar reminder for every six months: pull the kit out, check every medication, ointment, and even the latex‑free gloves. Replace anything that’s past its date, and restock any items you used during a test run.
Quick test tip: once a month, simulate a minor emergency. Open a bandage, apply a gauze pad, and make sure the scissors cut cleanly. If the digital thermometer takes longer than a few seconds to power up, swap the batteries. Those tiny checks keep the whole kit reliable.
Here’s a concise checklist you can tape to the inside lid of the tote:
- Bandages, gauze, tape, gloves
- Antiseptic wipes, antibiotic ointment
- Scissors, safety pins, elastic wrap
- Thermometer, pain relievers, antihistamine
- Prescription meds in waterproof bag
- Pet meds and small pet‑first‑aid guide
- Spare AA/AAA batteries for the thermometer
When you close the lid and see a tidy, complete set, you’ll feel a wave of confidence that you’ve covered the health side of any outage.
Finally, remember that a first‑aid kit is only as good as the knowledge behind it. Keep a printed one‑page cheat sheet of “What to do for a cut, a burn, or an allergic reaction” in the same tote. In a power outage, clear steps beat panic every time.
Take a few minutes tonight to pull out your tote, compare it to this list, and add any missing pieces. A little effort now means you won’t be scrambling when the lights go out – and that peace of mind is worth every bandage.
Step 5: Add Communication and Safety Tools
When the lights go out, the first thing that jumps to mind is “How am I going to know what’s happening?” That’s the exact moment you realize a solid power outage emergency kit checklist needs solid communication gear. Without a way to stay informed or call for help, even the best food or lighting supplies can feel pointless.
Why communication matters (and what the pros recommend)
Utilities and emergency managers stress that a battery‑operated radio is the single most reliable source of real‑time updates when the grid is down. Unlike smartphones, a radio doesn’t need a cellular tower – it pulls its signal straight from local broadcasters or NOAA weather channels.
Virginia Tech’s emergency preparedness guide also lists a handful of low‑tech items – like a whistle and a printed contact sheet – as essential because they work even when every electronic device is dead (see guide). Those simple tools are the backbone of any communication plan.
Step‑by‑step: Build the communication layer of your kit
1️⃣ Choose the right radio. Look for a hand‑crank or solar‑charged NOAA weather radio that also has a built‑in flashlight. The crank ensures you can generate power on the spot, while the flashlight doubles as an emergency light.
2️⃣ Add portable power. A high‑capacity external battery pack (think 20,000 mAh) will keep smartphones, tablets, and a small USB radio alive for at least 48 hours. Pair it with a set of spare AA/AAA batteries for any devices that still run on removable cells.
3️⃣ Secure a two‑way radio or walkie‑talkie. If you live in a neighborhood that shares a community channel, a basic 2‑meter FRS/GMRS set lets you check in with neighbors without relying on the cellular network.
4️⃣ Create an emergency contact sheet. Write down primary phone numbers, a designated meeting point, and the address of the nearest shelter. Print it on waterproof paper and tuck it into the same tote as your other supplies.
5️⃣ Pack a loud whistle. A whistle can signal rescuers if you’re trapped or need to draw attention in a dark hallway. It’s cheap, lightweight, and works forever.
6️⃣ Test everything. Once a month, turn on the radio, simulate a battery swap, and send a test text to a family member. If the radio’s battery drains in under a minute, replace it. This habit keeps the kit from gathering dust.
Real‑world examples
Take the Martinez family from Colorado. During a three‑day outage last winter, their NOAA radio warned them of an incoming ice storm, giving them enough time to move the kids to a heated basement. Their two‑way radios let the dad check on an elderly neighbor without leaving the house.
Or think about Jenna, a pet owner in Florida. She kept a waterproof whistle and a small “pet‑first‑aid” note in her tote. When a sudden blackout caused a power‑outage panic at the vet clinic, she was able to call the clinic on her charged phone, and the whistle helped the staff locate her dog in the dark hallway.
Quick comparison table
| Tool | Primary Use | Power Source / Notes |
|---|---|---|
| NOAA weather radio (hand‑crank) | Live alerts, weather updates | Crank, solar panel, AA batteries |
| External USB battery pack (20 k mAh) | Charge phones, tablets, USB radios | Rechargeable; keep a spare set of AA/AAA |
| Two‑way walkie‑talkie (FRS/GMRS) | Neighborhood check‑ins, rescue signaling | Replaceable AA batteries; simple one‑button operation |
| Emergency contact sheet (waterproof) | Quick reference for family & emergency services | No power needed; laminated for durability |
| Loud whistle | Audible distress signal | Never needs power; lasts forever |
Putting it all together
Grab a sturdy waterproof tote (the same one you use for food and first aid) and line it up with the items above. Arrange the radio at the top so you can flip it on without digging. Slip the contact sheet into a zip‑top pocket, and tape the whistle to the side for easy access.
Now, run through a quick drill: power the radio, switch to the emergency channel, send a text, and blow the whistle. If anything feels clunky, swap it out tomorrow. The goal is to make the kit feel like a natural extension of your daily routine, not a mysterious box you only think about during a storm.
Remember, the best tool is the one you actually use. So, keep the radio visible, the battery pack charged, and the contact sheet updated. When the next outage hits, you’ll already have a clear line to the world – and that peace of mind is worth every minute you spent prepping.
Step 6: Bonus Tips & Maintenance Schedule
Now that your kit is packed and tested, the real secret is keeping it fresh. A power outage emergency kit checklist is only as good as the items that actually work when the lights go out.
Make a quick visual audit each month
Grab the tote, open the lid, and do a two‑minute sweep. Does the radio still click on? Are the LED bulbs charging? If anything feels sticky or dead, swap it out right then. This tiny habit beats the panic of discovering a flat battery during a storm.
Why bother? Because batteries lose charge even when they sit idle, and food supplies can expire faster than you think. A monthly glance catches problems before they become emergencies.
Rotate supplies with the “first‑in, first‑out” rule
Think of your kit like a pantry. The oldest water bottles or canned goods should be the first you pull out for your next drill. Then replace them with fresh stock. The same goes for batteries – pop the oldest AA/AAA into a spare device and charge fresh ones.
Does this sound like a chore? Not really. Set a calendar reminder on your phone for the first Saturday of every month, and you’ll barely notice the routine.
Seasonal tweaks keep you ready year‑round
Summer heat can melt cheap plastic water containers, while winter can freeze battery connections. Before the season changes, swap a sturdy, food‑grade 5‑gallon water jug for an insulated one, and test that your flashlight still beams through frost.
In colder months, add a thermal blanket or a compact hand‑warmers pack. In the summer, toss in a small solar‑charged lantern – it’s a cheap insurance policy if your main battery runs low after a long heat wave.
Document everything in one place
Take a photo of each item’s label and paste the images onto a single page inside the tote. Write the purchase date, expiration, and a quick “✔️” column for when you’ve checked it. When you glance at that page, you’ll know exactly what needs swapping.
We’ve seen families use a simple spreadsheet on their phone, but a printed sheet survives a power loss better than a cloud‑based doc.
Bonus tip: Add a “what‑if” scenario card
Write a one‑line scenario on a card – “If the generator won’t start, use the battery‑powered radio and contact neighbor X.” Slip that card into the same pocket as your emergency contact sheet. It turns vague anxiety into a clear action plan.
- Check battery‑powered radio weekly.
- Rotate water and food every six months.
- Swap old batteries for fresh ones each month.
- Update the photo‑sheet after any replacement.
- Review the “what‑if” card before each drill.
Where to find reliable guidelines
State emergency management agencies often publish ready‑made checklists that match the items we’ve covered. The South Carolina Emergency Management Division, for example, walks you through family‑level kit basics and even suggests a visual audit routine here. Their approach lines up perfectly with the monthly maintenance habit we just described.
Another practical resource is Stearns Electric’s blog on power outage preparation. They remind homeowners to test their backup power sources after extreme weather, which reinforces our recommendation to run a quick radio‑on‑test after any storm here.
Putting the schedule into your calendar
Open your favorite calendar app and create a recurring event titled “Kit Maintenance.” Set the reminder for the first Saturday of each month at 10 a.m. – a time most people are still at home and can spare ten minutes.
In the event notes, paste the bullet list above and attach the photo‑sheet file. When the alert pops up, you’ll have everything you need right at your fingertips.
And there you have it – a low‑effort maintenance routine that turns a static checklist into a living, breathing safety net. By staying on top of the tiny details, you protect your family, your peace of mind, and you avoid the scramble when the next outage rolls around.
FAQ
What should be on my power outage emergency kit checklist?
Start with the basics: a hand‑crank or solar NOAA weather radio, a high‑capacity USB power bank, spare AA/AAA batteries, LED lanterns, headlamps, a few rechargeable LED bulbs, bottled water (one gallon per person per day for a week), non‑perishable foods, a manual can opener, and a compact first‑aid kit. Add a whistle, waterproof contact sheet, and a multi‑tool. Tailor the list for pets, kids, or seniors by slipping in pet food, comfort items, and any prescription meds.
How often should I rotate or test the items in my kit?
Give each component a monthly “quick look.” Flip the radio on, press a button on the power bank, and make sure the lantern runs for at least ten minutes on its highest setting. For consumables like water and food, set a calendar reminder every six months to swap the oldest bottles or cans with fresh stock. Mark the date on each package so you never lose track.
What’s the best way to store batteries for long‑term use?
Keep alkaline batteries in a cool, dry place—think a kitchen drawer away from heat sources. For rechargeable lithium packs, store them at about 50 % charge and avoid leaving them in direct sunlight. A small zip‑top bag inside your waterproof tote works well; you can pull it out each month to check voltage with a cheap tester. Replace any that show a noticeable drop.
How can I keep my kit lightweight yet comprehensive?
Choose multi‑purpose gear. A LED lantern with built‑in USB ports can double as a charger for phones. A headlamp with a long‑life battery replaces a separate flashlight. Look for a compact first‑aid kit that folds flat and includes a few essential medications instead of a full pharmacy. Every ounce saved means you can add an extra water bottle without feeling the weight.
Are there specific items I need if I have kids or elderly relatives?
Yes—think comfort and safety. For kids, add a small stash of their favorite snack, a battery‑powered storybook, and a soft blanket. For seniors, include a large‑button flashlight, extra hearing‑aid batteries, and a printed list of emergency contacts in big print. A simple “what‑to‑do” card for each age group can guide them through basic steps without overwhelming them.
What should I do if my generator won’t start during an outage?
First, check the fuel level and make sure the spark plug is clean. If it still won’t turn over, switch to your backup radio and power bank to stay informed while you troubleshoot. Keep a spare set of spark plugs and an emergency fuel stabilizer in your kit. In a pinch, you can run a small inverter‑powered LED lantern off your power bank to keep the lights on while you sort the generator.
How do I create a quick visual audit each month?
Grab your tote, open the lid, and scan the top layer for any expired dates or dead batteries. Flip each LED bulb to make sure it still lights, tap the radio to hear a click, and glance at the water containers for cloudiness. If anything feels off, swap it out and note the change on a small checklist you tape inside the lid. This two‑minute habit catches problems before a storm hits.
Conclusion
So you’ve walked through every piece of a solid power outage emergency kit checklist – from the bright LED lantern on the counter to the tiny whistle tucked in a pocket.
What does it all add up to? A kit that feels less like a daunting project and more like a trusted sidekick you can grab in a minute. You’ve got lighting, food and water, first‑aid essentials, communication gear, and a simple monthly maintenance habit baked right in.
Here’s the sweet part: you don’t need to reinvent the wheel. Grab a piece of paper, jot down each category, and tick off the items you already own. Then fill the gaps with a few smart purchases – a hand‑crank NOAA radio, a 20 k mAh power bank, a spare set of AA batteries. In our experience, seeing the checklist come together makes the “what if” anxiety fade fast.
Does it feel overwhelming? Not when you break it down into bite‑size actions. Test the radio this weekend, swap out the oldest water bottles, and stick a laminated “what‑if” card on the tote lid. A quick visual audit each month will keep everything fresh.
Ready to lock it in? Take the checklist you just built, store it where you’ll see it, and set a calendar reminder for the first Saturday of next month. You’ll sleep easier knowing you’ve got a plan that actually works.


Leave a comment