
How to Measure Curtains Length and Width: A Step-by-Step Guide

Ever stood in front of a window, tape in hand, and wondered why your new curtains look either too short or just a tiny bit too tight?
If you’ve ever faced that frustration, you’re not alone—getting the length and width right is the secret sauce that turns a plain room into a polished sanctuary.
The good news? Measuring isn’t rocket science. With a few simple steps, you can confidently answer the question, “how to measure curtains length and width,” and avoid costly returns.
First, grab a steel tape (or a laser measurer if you’re feeling fancy) and note the exact width of your window opening—from edge to edge, not the frame.
Now, decide how much fullness you want. Designers like Joanna Gaines recommend 1.5 × the window width for a relaxed look, while a formal drape can go up to 2 × for that plush, gathered feel.
Multiply that number by two (since curtains come in pairs) and add an extra 4–6 inches total—this extra allowance ensures the panels overlap nicely in the center.
For length, stand on the floor and decide your preferred finish: a clean skim (just a whisker above the floor), a slight puddle (1–2 inches), or a dramatic drop that kisses the carpet.
Measure from the top of the rod (or the point where the curtain will hang) down to that chosen endpoint. If you’re using a ceiling‑mount, add a couple of inches so the fabric doesn’t scrape the ceiling.
A quick sanity check: double‑check your numbers, then lay the tape on the floor to visualize the final drop. Imagine the curtain swaying gently—that’s the vibe you’re aiming for.
Here’s a real‑world example: Jane’s living‑room window is 48 in wide. She wants a soft, gathered look, so she multiplies 48 × 1.75 = 84 in, doubles it for two panels (168 in) and adds 6 in for overlap, landing at 174 in total width. For length, she chooses a 2‑inch puddle on her hardwood, measuring 84 in from rod to floor, then adds 2 in, giving 86 in.
If you’re still unsure about the exact numbers, our Blanket Sizes Chart: Complete Guide to Choosing the Right Fit breaks down measurement math in a simple table you can copy‑paste for any window.
And when you’re ready to turn those numbers into reality, don’t forget the bigger picture—sometimes the window frame itself needs a little TLC before hanging curtains. That’s where a professional builder can help, especially if you’re remodeling.
For a trusted partner, check out A Rural Builder’s Guide to Choosing a Maintenance Builder for Farm Renovations—they’ll walk you through the steps to prep your home so your new curtains fit like a glove.
Bottom line: measure twice, add the right fullness, decide your finish, and you’ll never have to wrestle with curtains that look off‑center again. Ready to grab that tape and start?
TL;DR
Master how to measure curtains length and width with a quick guide that removes guesswork, saves money, and ensures a perfect fit every time. Follow our tips, visual examples, and tool recommendations to confidently choose fullness, length style, and mounting method, turning any window into a polished, functional focal point.
Step 1: Measure the Window Width
Picture this: you’re standing in front of a sun‑splashed window, tape measure in hand, and you’re wondering if you’ve ever really measured a window before. It’s a tiny moment of doubt that can turn a simple DIY project into a costly mistake. The good news? The trick is simpler than you think once you break it down into bite‑size actions.
First things first – grab a steel tape. Fabric‑covered tapes love to stretch, and that extra inch can throw off every calculation you make later. Lay the tape flat against the wall, not the frame, and run it from the left edge of the opening to the right edge. This gives you the *raw* opening width.
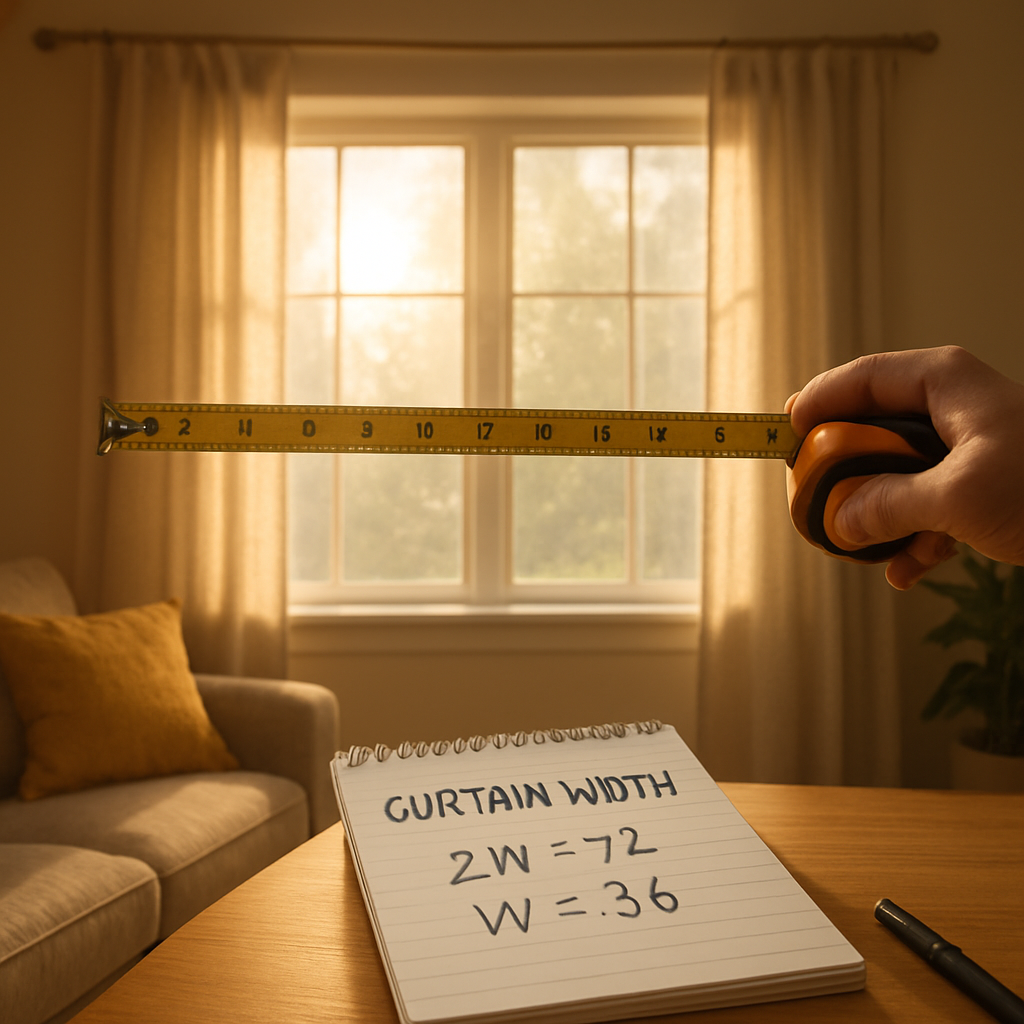
Now, ask yourself: how much “fullness” do you want? Fullness is the extra fabric that creates that soft, gathered look we all crave. Most designers recommend at least 1.5 × the opening width for a relaxed feel, and up to 2 × if you love a plush, theater‑style drape. Let’s run a quick example. If your window opening is 48 in, multiply that by 1.5 → 72 in. That’s the total width you’ll need before you split it into panels.
Split the total width in half (or thirds, if you’re planning three panels) to figure out each panel’s width. For a standard two‑panel setup, 72 in ÷ 2 = 36 in per panel. But don’t forget the overlap – add about 4–6 in to the combined width so the panels meet nicely in the middle without a glaring gap.
Real‑world scenario: Maya’s bedroom has a 60‑in opening. She wants a slightly gathered look, so she multiplies 60 × 1.6 ≈ 96 in. Dividing by two gives 48 in panels, then she adds a 5‑in overlap, landing at a total of 101 in. When she orders her custom panels, the result is a curtain that drapes just right, no awkward gaps.
Here’s a quick checklist you can tape to your workspace:
- Use a steel tape – no stretch.
- Measure the opening edge‑to‑edge, not the frame.
- Decide on fullness (1.5 × – 2 × the opening).
- Divide by the number of panels you’ll use.
- Add 4–6 in for overlap.
And remember, each window is its own beast. Even if two windows look identical, measure them separately. A tiny variance of an inch or two can change how the curtains stack.
Once you’ve got your numbers, jot them down in a notebook or a phone note. I like to write “Width = 101 in (total), 48 in per panel + 5 in overlap.” That way, when you head to the checkout, you have a clear spec to feed into the order form.
Speaking of ordering, if you’re curious about how a perfectly measured width looks on a finished product, check out this Waterproof Shower Curtain – it’s a great example of a product that relies on precise width calculations to ensure a flawless fit.
Finally, a little side note for the DIY‑enthusiasts who love a full home refresh: while you’re perfecting your curtain dimensions, you might also consider giving your cabinets a fresh look. A quick respray can tie the whole room together, and Dublin Respray offers a hassle‑free way to upgrade those surfaces without breaking the bank.
With these steps in your toolbox, you’ve turned a vague idea into a concrete number you can trust. Measure twice, add the right fullness, note the overlap, and you’re ready to move on to the next step – figuring out the perfect drop length.
Step 2: Choose a Curtain Length Style
Now that you’ve nailed the width, it’s time to ask yourself the big question: how long should those panels actually be? The answer isn’t just “measure to the floor.” It’s a mix of function, vibe, and a pinch of personal drama.
Do you want a crisp, hotel‑style skim that barely kisses the tiles? Or are you dreaming of a romantic puddle that gathers a couple of inches of fabric on the rug? Your answer will set the tone for the whole room.
Three go‑to length styles
Here’s a quick cheat sheet of the three most popular length choices. Pick the one that feels right for your space, then we’ll walk through the exact measurement steps.
| Length Style | Typical Drop | Best For |
|---|---|---|
| Floor‑skim | 1/2‑inch to 1‑inch above floor | Modern minimalism, high‑traffic areas |
| Light puddle | 1‑2 inches on floor | Cozy bedrooms, living rooms with rugs |
| Heavy puddle | 2‑4 inches on floor | Traditional décor, dramatic statements |
Notice how each style carries its own personality? A floor‑skim feels sleek, a light puddle adds softness, and a heavy puddle says “I’m not afraid of a little drama.”
So, how do you actually measure? Grab your tape and follow these steps, and you’ll have a number you can feed straight into Immaculon’s custom curtain builder.
Step 1: Mark your starting point
If you’re using a rod, measure from the top of the rod to the floor. If you’re mounting on a track or a ceiling‑mounted rod, start from the highest point the fabric will sit. A quick tip: use a small piece of painter’s tape on the wall to note the exact spot – it saves a lot of guesswork later.
Step 2: Decide your finish
For a floor‑skim, aim for ½‑inch to 1‑inch clearance. For a light puddle, add 1‑2 inches. For a heavy puddle, add 2‑4 inches. Write the chosen number down next to your starting point.
Think about your flooring. Hardwood or tile loves a neat skim, while plush carpet can handle a bit more fabric without looking sloppy.
Step 3: Measure down
Pull the tape down from your marked start point to the floor, then add the extra inches you noted in Step 2. That final number is your curtain length.
Example: Your rod sits 84 inches above the floor, and you want a light puddle. 84 in + 2 in = 86 in. Order 86‑inch panels and you’ll get that perfect, relaxed drop.
Does this feel overwhelming? Not at all – it’s basically the same routine you use to measure a table leg, just with a little more style flair.
One more thing: if you have a very tall ceiling and you love that dramatic look, consider mounting the rod a few inches higher than the window frame. That extra height instantly adds presence without changing the fabric width.
Now, let’s see a visual walk‑through. Below is a short video that demonstrates the measurement process in real time, so you can follow along with your own tape.
Watch the video, pause at each step, and compare the numbers you wrote down. When you’re happy with the length, you’re ready to move on to the final stage: ordering and hanging.
Remember, the right length doesn’t just look good – it also helps the curtain glide smoothly on the rod, reducing wear over time. A properly measured drop means you won’t have to wrestle with fabric that drags or constantly brushes the floor.
Take a moment now to decide which style speaks to you, jot down the exact inches, and you’ll be one step closer to that Instagram‑worthy window.
Step 3: Measure Curtain Length Accurately (Video)
Alright, you’ve picked your length style and you’ve already watched the quick walk‑through. Now it’s time to turn that video into actual numbers you can feed into Immaculon’s custom builder.
Grab your steel tape, stand where you’ll be hanging the rod, and let’s break the process down into bite‑size actions. You’ll feel like a pro after just a few minutes.
1️⃣ Mark the exact starting point
First, decide where the top of the curtain will sit. If you’re using a standard rod, the top is the rod’s outer edge. If you’ve gone for a ceiling‑mount track, snap a tiny piece of painter’s tape at the highest point the fabric will rest. I always write the height on the tape with a Sharpie – that way I never lose the reference.
Pro tip: measure from the floor to that mark now, then add your chosen finish (skim, light puddle, heavy puddle). This two‑step method eliminates the “I think I added the wrong extra inches” moment.
2️⃣ Decide your finish and add the allowance
Do you want a sleek floor‑skim? Add ½‑inch to 1‑inch. Light puddle? Add 1‑2 inches. Heavy puddle? Add 2‑4 inches. Write the extra amount right next to the height you just noted.
For example, Maya’s bedroom rod sits 84 in above the hardwood. She wants a light puddle, so she adds 2 in. Her final length is 86 in. Simple, right?
3️⃣ Measure down and double‑check
Pull the tape from your marked start point straight down to the floor, then add the extra inches you noted. Keep the tape taut – any slack will throw the whole calculation off by a half‑inch or more.
Once you have the number, repeat the measurement from a second spot on the wall (top‑left corner, middle, or right side) and compare. If the two readings match within an inch, you’re good to go.
4️⃣ Real‑world examples to cement the method
Example A – High‑ceiling living room: The rod is mounted 96 in above the floor. The homeowner prefers a dramatic drop that pools 3 in on a plush rug. Length = 96 + 3 = 99 in. After ordering, the curtains just kiss the rug without looking sloppy.
Example B – Small apartment kitchen: The rod is only 72 in high. A floor‑skim is ideal to keep the space feeling airy. Length = 72 + 0.5 = 72.5 in. The panels glide silently on the rod, and there’s no tripping hazard.
5️⃣ Tools and tech that make it painless
A sturdy steel tape is non‑negotiable. If you prefer a digital aid, the outside‑mount width guidelines on Best Buy Window Treatment explain how laser measurers can lock in a single reading and reduce human error.
Some DIYers swear by a simple phone app that records the measurement and lets you add the extra inches with a tap. Whatever you choose, the rule of thumb is: measure twice, write once.
6️⃣ Checklist before you hit “order”
- Mark the exact rod‑top point with tape.
- Choose your finish (skim, light puddle, heavy puddle).
- Measure down, add the allowance, keep the tape tight.
- Repeat the measurement in at least two spots.
- Record the final number in inches (or cm if you prefer).
- Cross‑check with the video timestamps to make sure each step lines up.
When you’ve ticked all the boxes, you’ll have a number you can copy straight into Immaculon’s custom order form.
7️⃣ Expert insight
Interior‑design consultants often say the “right length” is the one that makes the curtain look like an extension of the wall, not a piece of fabric fighting gravity. A well‑measured drop reduces friction on the rod, extending the lifespan of both the hardware and the fabric.
And here’s a little secret: if your floor is uneven, measure at the highest point of the floor and add a half‑inch. That tiny adjustment prevents one side of the curtain from constantly scraping while the other floats.
8️⃣ Connecting the dots
Measuring curtains is a lot like picking the perfect rug – you need the right dimensions to anchor the room’s visual balance. Need a quick refresher on how to size a rug? Check out our Area Rug Size Guide Living Room for a side‑by‑side comparison of width, length, and placement.
Finally, if you’re tackling a larger home makeover that includes the outdoors, you might also appreciate this guide on Porcelain Pavers for Patio. A cohesive design starts at the window and flows all the way to the patio.
Take a breath, jot down those final inches, and you’ll be ready to place an order that looks Instagram‑ready the first time it arrives.
Step 4: Calculate Fabric Requirements
Alright, you’ve got your width and length numbers nailed down, so now it’s time to turn those inches into actual fabric. This is the part where you ask yourself, “Do I really need that much material?” and then answer, “Yes, because a little extra saves you from a DIY disaster later.”
First, grab a piece of paper (or your phone notes) and write down the total width you calculated for the whole window, not just one panel. Remember, if you’re using a 1.5× fullness rule on a 48‑inch opening, you’ll end up with about 72 in total width. Multiply that by the number of panels you plan to order – usually two – and you’ve got the raw fabric width you’ll need.
Step 1: Add seam and hem allowances
Fabric doesn’t magically stitch itself. Add about 1‑inches on each side for the side seams and another 2‑inches at the bottom for the hem. If you love a deep, weighted look, give yourself an extra half‑inch for a “pocket hem” that lets the fabric fall a bit more gracefully.
So, a 72‑inch panel becomes roughly 74 in wide after seam allowances. Multiply by two panels and you’re looking at 148 in of usable width.
Step 2: Account for pattern repeat (if any)
Do you have a striped or floral print that repeats every 18 in? Then you need to round your fabric width up to the nearest multiple of that repeat. It’s a tiny math trick that prevents a mismatched pattern at the seam.
For example, 148 in divided by 18 in equals 8.22… round up to 9 repeats, which gives you 162 in of fabric width. That extra 14 in might seem wasteful, but it saves you a jarring visual break.
Step 3: Convert width to yardage
Fabric is sold by the yard (or meter), and the width of the bolt is usually 54 in or 60 in. If your bolt is 54 in wide, you’ll need to join multiple strips to reach 162 in. Here’s a quick way to figure it out:
- Divide the total required width (162 in) by the bolt width (54 in) = 3 strips.
- Each strip is the length you measured for the drop – say 86 in for a light puddle.
- Convert 86 in to yards: 86 ÷ 36 ≈ 2.39 yd. Multiply by 3 strips = 7.17 yd.
Round up to the nearest half‑yard, so you’d order 7.5 yd of fabric.
Step 4: Factor in extra for errors
Even the most careful DIYer can mis‑measure by a half‑inch or cut a seam a tad off. Adding a “safety margin” of 0.5 yd never hurts. It’s the cushion you’ll thank yourself for when the curtains finally hang perfectly.
Now you’ve got a solid number: 8 yd of 54‑inch‑wide fabric will cover your window with a nice pattern match, seam allowance, and a little wiggle room.
Does this feel overwhelming? Not really – it’s just a series of tiny math steps that keep you from ordering too little (and having to reorder) or too much (and wasting money). Think of it like baking: you follow a recipe, measure each ingredient, and you end up with a delicious cake instead of a flat pancake.
Quick checklist before you click ‘Add to Cart’
- Write down total panel width (including fullness).
- Add 1‑in side seams + 2‑in bottom hem per panel.
- Round up for pattern repeat if your fabric has one.
- Divide by bolt width to determine number of strips.
- Convert drop length to yards and multiply by strip count.
- Add 0.5 yd safety margin.
Grab that calculator, plug in your numbers, and you’ll have a crystal‑clear fabric requirement. No more guessing, no more “oops, too short” moments.
And remember, the whole point of learning how to measure curtains length and width is to walk away with a window treatment that feels custom‑made, even if you bought the fabric off the shelf.
Once you’ve ordered the fabric, the next step is cutting, stitching, and hanging – but that’s a story for the next section.

Step 5: Verify and Adjust Measurements
Alright, you’ve just crunched the numbers and know exactly how many yards of fabric you’ll need – but before you hit “order,” it’s worth taking a breath and giving those measurements a quick reality check.
Why double‑check? Because even a half‑inch off can turn a sleek floor‑skim into a frustrating drag, or leave you short on fabric and scrambling for a last‑minute fix. A few minutes of verification saves you from a costly return later.
1️⃣ Run the math twice (or three times)
Grab a notebook or, even better, a simple spreadsheet. Enter the raw width of your window, the fullness multiplier, seam allowances, and any pattern‑repeat adjustments. Then add the length, the drop allowance, and the safety margin.
Now hit “sum” again. If the totals match your earlier handwritten notes, you’re probably good. If they don’t, trace where the discrepancy slipped in – most often it’s an extra inch added for hem that you forgot to multiply by the number of panels.
Does this feel like overkill? Think of it as a quick audit; the spreadsheet can be saved for future projects, turning the verification step into a reusable template.
2️⃣ Measure against a real‑world reference
Take a piece of scrap fabric or even a large sheet of printer paper and lay it on the window opening. Mark the edge where the curtain will start (usually the rod or track) and the spot where you want the bottom to land.
If the scrap covers the opening with a little overlap, you’ve confirmed your width. If it falls short, add a few more inches now rather than after the fabric arrives.
Seeing the dimensions in physical form also helps you spot any oddities, like a window that isn’t perfectly rectangular or a floor that slopes.
3️⃣ Adjust for seams, hems, and pattern repeats
Remember that the numbers you entered already include 1‑in side seams and a 2‑in bottom hem per panel, but some styles need extra room. Eyelet curtains, for example, often require an additional half‑inch at the top for the metal rings.
If your fabric has a pattern repeat, double‑check that the repeat length divides evenly into the panel length you’ve calculated. If it doesn’t, round up to the next full repeat – it’s better to have a tiny bit of extra fabric than a mismatched stripe.
And don’t forget about the “pocket hem” trick: adding .5‑inch to the bottom hem lets the curtain sit gently on the floor without dragging.
4️⃣ Re‑calculate yardage with the adjusted numbers
Take the final panel length (including any extra top or bottom allowances) and convert it to yards: divide by 36. Multiply that yardage by the number of strips you’ll need based on bolt width. Finally, add the 0.5‑yd safety margin we mentioned earlier.
Here’s a quick example: a 86‑inch drop becomes 2.39 yd. If your bolt is 54 in wide and you need three strips, that’s 2.39 × 3 = 7.17 yd. Round up to 7.5 yd, then tack on the extra .5 yd buffer for a total of 8 yd.
Once you’ve ticked each box, you can place your order with confidence, knowing the curtains will drape just the way you imagined. And if you ever wonder whether you missed something, the checklist is there to remind you.
Quick verification checklist
- Re‑enter every number in a spreadsheet or calculator.
- Lay a scrap piece of fabric on the window to confirm width.
- Confirm side‑seam, top‑ring, and bottom‑hem allowances for your curtain style.
- Check that pattern repeats line up with panel lengths.
- Convert final lengths to yards and add a 0.5‑yd buffer.
- Take a photo of your notes and the scrap layout – it’s a handy reference if you need to contact support.
So, what’s the next move? Hit that “Add to Cart” button, then sit back and picture the moment you pull the new panels across the rod – a perfect fit, no surprises, just a room that feels instantly more polished.
FAQ
How do I know the right width for my curtains?
Start by measuring the opening from edge to edge, not the frame. Multiply that number by 1.5‑2 × depending on the fullness you want—1.5 × for a relaxed look, 2 × for a plush, theater‑style drape. Then double the total for a two‑panel setup and add 4–6 in for overlap. The final figure is the total width you’ll enter when ordering and double‑check the math before you click ‘Add to Cart’.
What’s the best way to measure curtain length for a floor‑skim versus a puddle?
Measure from the point where the curtain will hang—usually the top of the rod or track—to the floor. For a floor‑skim, subtract half an inch to an inch so the fabric barely clears the ground. If you prefer a light puddle, add 1–2 in; for a heavy puddle, add 2–4 in. Write the final number down, then tape a small piece of painter’s tape at that height on the wall to visualise the drop before you order.
Do different curtain styles need different allowances?
Yes—different curtain styles often need their own allowances. Eyelet panels typically require an extra half‑inch at the top for the metal rings, while pleated curtains need 1‑2 in of extra fabric to accommodate the folds. Sheer or voile curtains can get away with a slimmer hem, but adding at least 1 in still gives a neat finish. Tweak these allowances before you convert the total inches to yards so you avoid ordering too little.
How can I double‑check my measurements before ordering?
Create a quick spreadsheet that lists raw width, fullness multiplier, seam allowances, and overlap, then let the formulas add everything up twice. Alternatively, lay a scrap piece of fabric—or even a large sheet of printer paper—across the window, mark the edges, and compare to your numbers. Take a photo of the layout for reference. If both methods match within an inch, you’re ready to place the order with confidence.
What role does the type of mounting (rod vs track) play in measuring?
The mounting point determines where you start measuring. With a traditional rod, you begin at the rod’s outer edge; with a ceiling‑mounted track, you start at the highest point the fabric will sit. A higher mount adds extra drop length, which can make a room feel taller. Remember to add any top‑ring or pocket‑hem allowances that specific hardware requires before you calculate the final length.
Why is a safety margin important when converting inches to yards?
When you convert inches to yards you round to the nearest half‑yard, and fabric bolts are sold in fixed widths. A small mis‑calculation—say half an inch—can mean you end up one strip short, forcing a rushed re‑order. Adding a 0.5‑yard safety margin cushions that risk, ensures the pattern repeat stays intact, and gives you a little wiggle room for any hemming adjustments later.
Can I use a smartphone app to measure curtains accurately?
Absolutely—many apps turn your phone’s camera into a laser‑like ruler. Position the phone at eye level, aim at the top of the rod, and let the app record the distance to the floor. Most apps let you add the extra inches for skim or puddle directly in the interface, then export the final measurement as a text note. Just double‑check the result with a physical tape to avoid any digital drift.
Conclusion
We’ve walked through every nuance of how to measure curtains length and width, from spotting the right starting point to adding the perfect finish.
So, what does all this mean for you? It means you can skip the guesswork, avoid costly re‑orders, and end up with panels that look custom‑made even if you bought off the shelf.
Remember the three quick checks: measure twice, add the fullness multiplier, and double‑check the drop against your flooring. If you keep those steps in mind, the curtains will hang just right – no extra fabric dragging, no awkward gaps.
Here’s a tiny checklist you can scribble on a sticky note:
- Mark the rod‑top point.
- Choose skim, light puddle or heavy puddle.
- Measure down, add allowance, note the number.
- Calculate width with 1.5‑2× fullness and add overlap.
- Add a 0.5‑yard safety margin.
If anything feels off, just re‑measure that spot and adjust – a small tweak now saves you a big hassle later.
And finally, take a moment to picture yourself pulling those perfectly fitted panels across the rod. That little “wow” feeling is exactly why we spend a few minutes measuring now.
Ready to put your new measurements into Immaculon’s custom builder? Grab your tape, hit the notes, and let the transformation begin.


Leave a comment