
How to Season New Grill Grates: Step‑by‑Step Guide for Perfect BBQ Prep
Ever fired up a brand‑new grill and watched the grates steam up like a mystery fog? I’ve been there— that first sizzle feels exciting, but the next time you try to flip a burger it sticks like it’s auditioning for a cling‑film commercial. That’s what happens when fresh metal meets moisture without a protective layer.
Seasoning your new grill grates is the simple ritual that turns raw steel into a non‑stick, rust‑proof surface. Think of it as the seasoning you give a cast‑iron skillet: you bake a thin film of oil into the metal so it becomes the grill’s own “non‑stick armor.” The payoff? Less rust, easier food release, richer grill marks, and a grate that lasts season after season.
Here’s what you’ll need: a high smoke‑point oil such as grapeseed, canola or refined vegetable oil; a roll of paper towels or a clean cloth; a pair of long‑handled tongs; and about 30‑45 minutes of your afternoon. No fancy gadgets required—just the basics you probably already have in the kitchen.
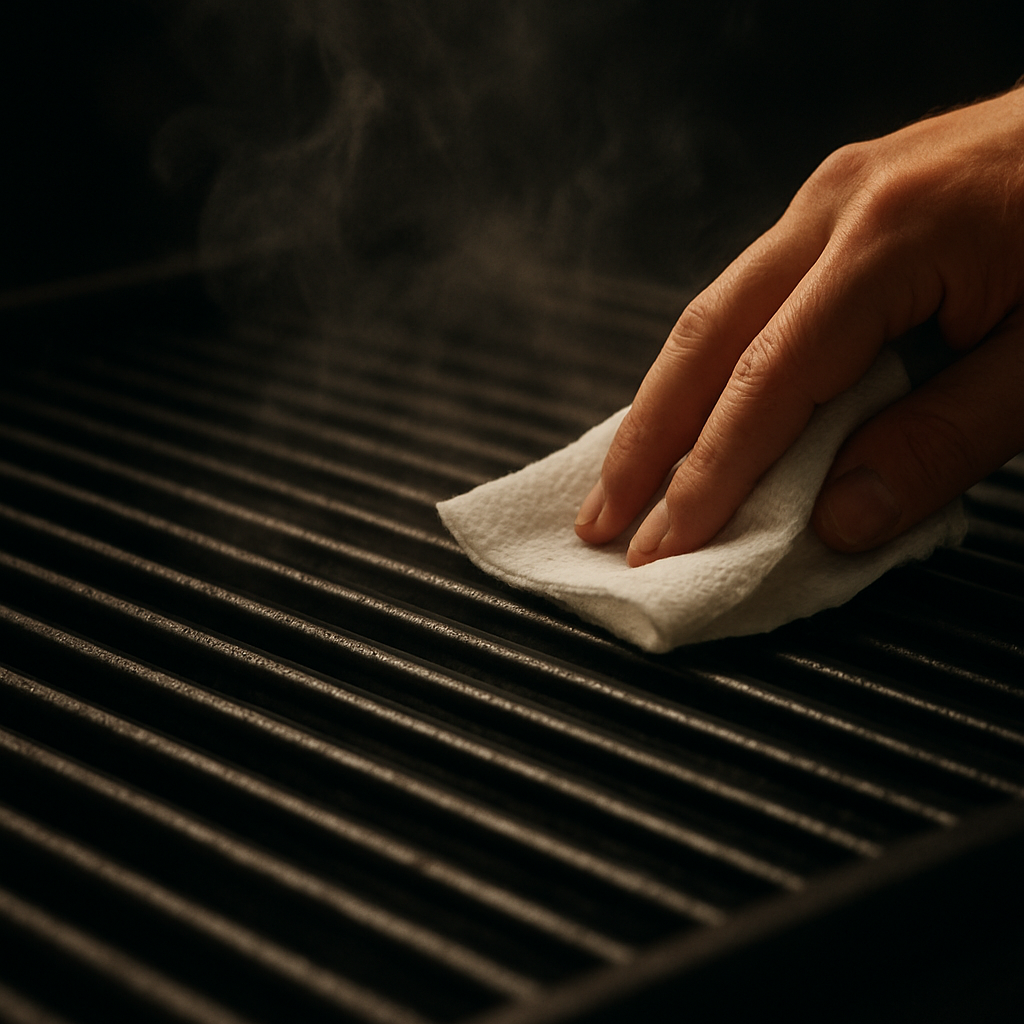
Step 1: Give the grates a quick wash with warm, soapy water to strip any factory residue. Rinse well and pat dry—any water left will steam and ruin the oil bond. Step 2: Using a paper towel and tongs, spread a *very* thin coat of oil over every groove and surface. Thin is key; a glossy puddle means you’ll end up with a sticky mess.
Step 3: Close the lid and crank the burners to high, aiming for 400‑500°F. Let the grill heat for 10‑15 minutes until the oil starts to smoke and darken. That smoke is the oil polymerizing, forming the protective layer. Step 4: Turn off the heat and let the grill cool completely before touching the grates.
Safety note: Keep the grill outdoors or in a well‑ventilated spot—expect a burst of smoke, and never handle the hot grates with bare hands. The oil will darken the metal; that’s a good sign, not a flaw.
Best‑practice tip: Grapeseed oil gives the cleanest finish because it has a 420°F smoke point and a neutral flavor. Apply the oil with a paper towel, then wipe off any excess so the coating is almost invisible. If you want an extra boost, repeat the heat‑oil‑cool cycle once more.
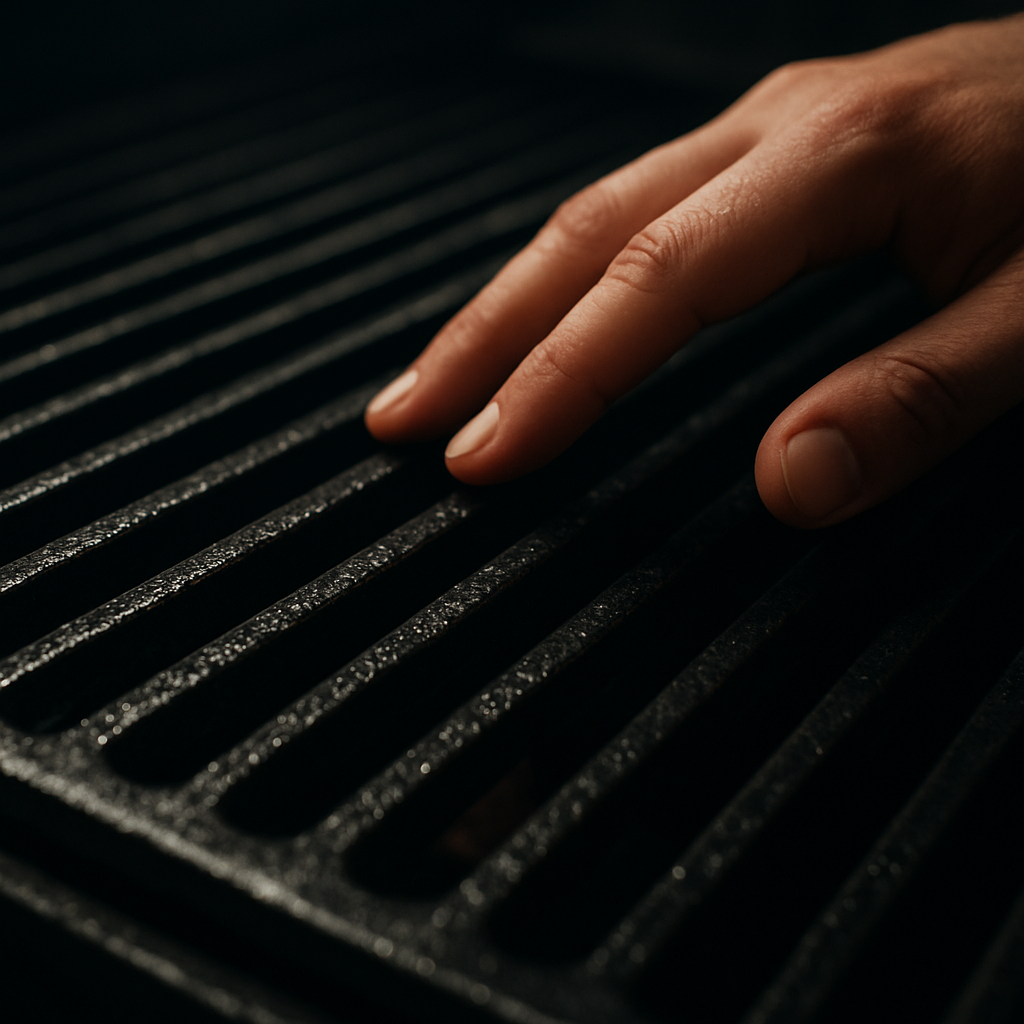
Once seasoned, your grates should look a deep, almost black shade with a faint sheen. When you lay down a steak, it should slide off with minimal resistance, leaving those coveted sear lines. To keep that magic alive, after each grilling session just scrape off food bits, give a light wipe with oil, and repeat the full seasoning routine only after a deep clean.
If you’re already hunting for the perfect grill to pair with this new routine, Immaculon’s kitchen collection has a range of electric BBQ grills and accessories that make the whole process a breeze. Explore their kitchen selection for options that come ready to season.
TL;DR
Seasoning new grill grates creates a black, non‑stop armor that blocks rust, boosts flavor, and lets your steaks glide off without sticking, even after countless cookouts.
Just wash, oil thinly, heat to 400‑500°F, cool, and repeat if you like—the simple ritual keeps your grill performing like new for years forever.
Step 1: Clean the New Grill Grates
Before you even think about oiling, you’ve got to get those fresh‑off‑the‑box grates spotless. Imagine trying to paint a wall that still has dust on it – the finish will never stick. The same idea applies here.
Start by giving the grates a quick rinse with warm, soapy water. Use a non‑abrasive grill brush or a soft scrub pad to whisk away the factory oil, metal shavings, and any protective coating the manufacturer left behind. If you notice stubborn residue, let the grates soak for a minute; the soap will loosen it without harming the metal.
Once the grime is gone, rinse thoroughly. Any soap left behind will create a foamy mess when you heat the grill later, and that’s the last thing you want. Pat the grates dry with a clean towel or let them air‑dry for a few minutes – just make sure there’s absolutely no moisture.
Why is this cleaning step so crucial? According to Taste of Home, seasoning not only builds a non‑stick barrier but also burns off any dust or contaminants that survived the manufacturing process. In short, a clean surface is the foundation for a solid, long‑lasting seasoning.
Now, while you’re standing there with the grates in hand, think about the kind of oil you’ll use. High‑smoke‑point oils like canola, grapeseed, or peanut are recommended because they won’t burn at the 400‑500°F range you’ll be heating to. Taste of Home notes that canola and peanut oils have smoke points over 450°F, making them ideal for this job.
Before moving on, do a quick visual check: the metal should be completely dry, free of suds, and look like raw steel. If you see any streaks of water, give it another wipe – those tiny droplets will steam and prevent the oil from bonding properly.
With the grates clean and dry, you’re ready for the next phase: the thin‑oil coating. But let’s pause for a second. Have you ever tried to season a grill and ended up with a sticky, gummy mess? That usually happens when the grates aren’t fully dry or when too much oil is applied. Keeping this in mind will save you a lot of frustration later.
Here’s a quick checklist to run through before you head to the kitchen:
- Warm, soapy water and a non‑abrasive brush ready.
- Clean, dry towel or a rack to air‑dry the grates.
- High smoke‑point oil (canola, grapeseed, or peanut).
- Long‑handled tongs for safe handling.
- 30‑45 minutes of free time on a sunny afternoon.
If you’ve got all that, you’re set. And if you’re wondering where to find a good oil, many of our readers keep a bottle of canola oil in the pantry alongside their favorite sauces – no extra trip required.
One more practical tip: while the grates are drying, you can pre‑heat the grill on low for a minute or two just to evaporate any lingering moisture. Turn the burners to low, let a gentle heat rise, then turn them off and let the grill cool. This extra step guarantees the surface is bone‑dry.
Now that the grates are clean, dry, and ready, you’ll notice the metal looking a bit brighter – that’s a good sign. It means you’ve removed the factory coating that can interfere with the seasoning’s polymerization later.
Ready to move on? The next step is all about coating the grates with a whisper‑thin layer of oil and then blasting them with heat. Trust me, once you see that deep, almost‑black sheen after the first cycle, you’ll know you did it right.
Need a quick place to pick up a high‑smoke‑point oil or a set of durable grill brushes? Check out Online shopping for Air Fryers with fast US shipping – they also carry kitchen accessories that work perfectly for grill prep.

That’s it for the cleaning phase. With a clean canvas, the seasoning process can work its magic and turn your brand‑new grates into a rust‑proof, non‑stick powerhouse.
Step 2: Apply Oil for Seasoning
Now that your grates are spotless and bone‑dry, it’s time for the part that actually creates that non‑stick armor: the oil. Think of it as giving the metal a thin, protective jacket that will keep rust at bay and let food glide off like it’s on a slick dance floor.
Why does a whisper‑thin coat matter? Too much oil turns the grates into a sticky mess, while too little leaves the metal exposed. The sweet spot is a barely‑visible sheen that disappears into the pores of the steel as it heats. That’s the magic polymerization we’re after.
What you’ll need
- High‑smoke‑point oil – canola, grapeseed, or refined avocado are top choices.
- Paper towels or a clean lint‑free cloth.
- Long‑handled tongs (or heat‑proof gloves) to keep your hands safe.
- Timer or a watch – you’ll need about 10‑15 minutes of steady heat.
Pro tip: If you’re low on oil, a quick drizzle into a small bowl and then dipping the towel works better than trying to pour straight from the bottle – you’ll get a more even film.
Step‑by‑step oiling
1. Warm the oil just enough to flow. Pop the bottle in warm water for a few seconds or give it a gentle shake. You don’t want it cold and clumpy.
2. Load the paper towel. Fold a paper towel several times, then drizzle a few drops of oil onto the center. Using tongs, hold the towel and spread the oil across the entire surface of the grate – top, bottom, and every little groove.
3. Wipe, don’t drench. The goal is a matte film that you can almost see through. If the towel looks shiny, grab a fresh one and wipe away the excess. You should hear a faint “sizzle” as the oil contacts the warm metal; that’s a good sign.
4. Flip and repeat. Turn the grill over (or move the tongs to the opposite side) and give the other side the same ultra‑thin coating. Consistency on both sides ensures the protective layer bonds evenly.
5. Let the oil sit for a minute. This allows the oil to soak into the micro‑texture of the metal before you crank up the heat.
Heating the seasoned grates
Close the lid and turn the burners up high. Aim for a temperature between 400°F and 500°F – you’ll know you’re there when the grill starts to emit a thin, blue‑gray smoke. Keep the grill at that heat for 10‑15 minutes. The oil will darken, then turn a deep, almost‑black hue. That’s polymerization in action, turning liquid oil into a solid, rust‑resistant coating.
Safety reminder: Keep a window open or grill outdoors. The smoke is harmless, but it can set off smoke alarms if you’re inside.
Cool down and check
After the timer dings, turn the burners off and let the grill cool completely before touching the grates. When it’s cool, run your fingertips lightly over the surface – you should feel a subtle slickness, not stickiness.
If the grates look uneven or you see a glossy puddle, that means you applied too much oil. No big deal – just wipe the excess with a clean towel and repeat the heat cycle.
Real‑world examples
• Weekend BBQ rookie: Jamie tried a thick coat of olive oil and ended up with a gummy residue that took an extra 30 minutes to scrape off. After switching to a thin grapeseed layer, the grates turned black in one heat cycle and his burgers slid right off.
• Seasoned grill master: Luis repeats the oil‑heat‑cool routine twice for a new cast‑iron grill. The double layer gave him a mirror‑like finish that lasts through winter storage without rust.
Best‑practice tips
- Use oils with smoke points above 400°F – grapeseed (420°F) and refined avocado (520°F) are especially reliable.
- Apply the oil when the grates are still warm from the cleaning step; heat helps the oil spread evenly.
- One thin coat is enough for most grills; repeat only if you want a deeper black color.
- Store the grill in a dry place, or give it a quick oil wipe before long periods of inactivity.
Need a handy place to snag a bottle of high‑smoke‑point oil or a set of sturdy grill accessories? Browse kitchen accessories that ship fast and keep your seasoning routine smooth.
And because you’ll likely be cooking protein‑rich meals on those newly seasoned grates, consider tracking your protein intake to make sure you’re getting the most out of every bite.
Once you’ve completed this step, you’ll notice the grates have a deep, almost‑glossy black finish. That’s the sign they’re ready for your first steak, salmon, or veggie kebab. Food will release effortlessly, grill marks will be sharp, and you’ll have a rust‑proof surface that lasts season after season.
Step 3: Heat the Grill to Set the Seasoning
Now that the grates are oiled, the real magic happens when you crank the heat. Think of it like a short, intense sauna for the metal – the oil polymerizes and fuses to the surface, creating that non‑stick armor we all crave.
First, close the lid and turn all burners to high. Aim for a temperature between 400°F and 500°F. If your grill has a built‑in thermometer, set it to 425°F; if not, an easy trick is to hold your hand about six inches above the grate – you should feel a firm, steady heat after a couple of seconds.
Why does that temperature window matter? Below 400°F the oil never fully bonds, leaving a weak layer that can flake off. Above 500°F you risk scorching the oil, which can create a gummy residue instead of a smooth, protective film.
So, what should you do once you hit the right heat? Let the grill run for 10‑15 minutes. You’ll see a thin, bluish‑gray smoke curling from the grates – that’s the oil breaking down and re‑forming into a polymer. The metal will gradually darken, shifting from a matte gray to a deep, almost‑black sheen. That visual cue tells you the seasoning is setting properly.
Here’s a quick checklist to keep the process on track:
- Heat range: 400‑500°F (aim for 425°F if you have a gauge).
- Time: 10‑15 minutes of steady heat.
- Ventilation: Open a window or grill outdoors – the smoke is harmless but can set off alarms.
- Safety: Never touch the grates with bare hands; use tongs or heat‑proof gloves.
Do you ever wonder why some people repeat the heat‑oil cycle? Repeating once gives you a thicker, richer coating that can withstand heavy searing or long‑term storage. It’s not required for a basic seal, but if you’re planning a winter‑time grill stash, the extra layer is worth the few extra minutes.
Real‑world example: My neighbor, Carla, lives in a humid coastal town. She seasons her grill twice – first run for 12 minutes, cool, re‑oil, then another 12‑minute blast. Six months later her grates still look brand‑new, and she’s never had a rust spot, even after a surprise rainstorm.
Another example: Jake, a city‑dweller with a compact gas grill, only does a single heat‑oil pass. He finds that his burgers still release cleanly, but after a few deep‑clean cycles the coating starts to wear. He now adds a second pass once a season and notices the difference instantly.
Safety reminder – the oil will darken the metal, and that darkening is exactly what you want. Don’t panic if the grates look almost black; that’s the polymerized shield forming. Once the timer dings, turn the burners off and let the grill cool completely before you touch anything. The cooling period lets the coating solidify.
After the grill is cool, run a clean paper towel over the grates. You should feel a faint slickness, not stickiness. If there are any glossy puddles, wipe them away – they’re excess oil that didn’t bond.
Need a sturdy place to store your grill accessories while the grates set? Check out this mobile kitchen island cart with spacious storage – it’s perfect for keeping tongs, brushes, and oil bottles within arm’s reach.
Looking to spread the word about your newly seasoned grill? A quick, eye‑catching ad can pull in fellow grill‑enthusiasts. Scalio’s AI ad platform helps you craft video and image ads in seconds, so you can share your grilling triumphs without the hassle.
Quick reference table
| Item | Recommended Range | Notes |
|---|---|---|
| Oil smoke point | 400°F‑520°F | Grapeseed (420°F) or refined avocado (520°F) work best. |
| Grill temperature | 400°F‑500°F | Use a thermometer or hand‑test; avoid overheating. |
| Heating duration | 10‑15 minutes | Longer if doing a second seasoning pass. |
Step 4: Repeat Seasoning Cycles for Durability
So you’ve got that first black, slick layer on the grates and it looks promising. But a single pass is just the beginning – think of it like a first coat of paint that still needs a second to really seal the deal.
Why bother with a second (or even third) seasoning cycle? A thicker polymerized shield blocks moisture better, wards off rust longer, and gives food an even smoother release. In short, it turns a good grill into a great one that lasts season after season.
What a repeat cycle actually does
Each time you heat‑oil‑cool, the oil molecules fuse deeper into the metal’s pores. The more layers you add, the harder it is for oxygen and water to sneak in. That’s why seasoned cast‑iron pans get that legendary non‑stick feel after a few rounds – the same chemistry applies to grill grates.
According to Traeger’s seasoning guide, the initial burn‑in removes factory residues and creates a durable, non‑stick surface, and repeating the process reinforces that protection.
How to repeat the cycle – step by step
1. Cool, clean, and re‑oil. Once your grill has cooled completely, give the grates a quick wipe with a dry paper towel. You’re not scrubbing – just removing any loose bits. Then, using a fresh towel, spread another whisper‑thin coat of high smoke‑point oil (grapeseed, refined avocado, or canola). Remember, the coating should be almost invisible.
2. Heat it up again. Close the lid and crank the burners to 400‑500°F. Let it smoke for another 10‑15 minutes. You’ll see the grates darken a touch more; that’s the new layer polymerizing.
3. Cool down. Turn the burners off and allow the grill to cool fully before touching anything. The cooling period solidifies the new film.
4. Repeat if you want extra durability. For grills that sit unused during winter or live in humid climates, a third pass can be a game‑changer. Just follow the same steps.
Best‑practice tips
• Oil choice matters. Grapeseed (420°F smoke point) and refined avocado (520°F) give the cleanest, most resilient coat.
• Thin is forever. If you can see the oil pooling, you’ve over‑applied – wipe it away before heating.
• Timing matters. Stick to 10‑15 minutes per heat cycle; longer can scorch the oil, shorter won’t fully bond.
• Ventilation is key. Expect a burst of smoke each cycle; keep windows open or grill outdoors.
Ongoing maintenance after you’ve built that armor
After each cooking session, scrape off food bits with a grill brush, then give the grates a light wipe with a dab of oil. You don’t need a full heat‑oil‑cool run every time – a quick “re‑oil” keeps the surface happy.
If you ever do a deep clean (say, you’ve stripped the grates for a thorough scrub), treat it as a fresh start and run through the full seasoning routine again. That’s the only time you’ll need to repeat the full cycles.
What should the finished grates look like? A deep, almost‑black hue with a faint, satin sheen. When you slide a steak onto them, it should glide away with barely a whisper of resistance, leaving crisp, caramelized grill marks.
And here’s a little extra: if you’re thinking about upgrading your kitchen setup to keep everything tidy while you season, check out stylish kitchen storage options that can hold your tongs, oil bottles, and brushes within arm’s reach.
That video walks you through a second seasoning pass, showing exactly where the smoke should appear and how long to hold the heat.
Bottom line: one pass gets you started, but repeating the seasoning cycle builds a resilient, non‑stick armor that protects your grill for years. Give it a try, and you’ll wonder how you ever cooked without that extra layer of confidence.
Step 5: Maintenance Tips & Re‑Seasoning Schedule
Now that your grates have that deep, black armor, the real test is keeping it that way. A little bit of daily TLC goes a long way, and it doesn’t have to feel like a chore.
Why does ongoing maintenance matter? Because a well‑seasoned surface protects the metal from rust, keeps food from sticking, and actually enhances flavor. Think of it as the sunscreen your grill needs every summer – skip it and you’ll see the damage sooner rather than later.
So, what should you be doing after each cookout? Let’s walk through a simple routine you can fit into the five‑minute cool‑down period.
Every‑Use Care Routine
Right after you finish cooking, turn the burners low for a minute to burn off loose bits. Then, with a soft grill brush, scrape away any charred residue. Finally, give the grates a quick swipe with a paper towel dabbed in a thin layer of high‑smoke‑point oil. That light oil coat re‑feeds the polymerized layer and keeps it from drying out.
- Brush while the grill is still warm (but not hot).
- Wipe with a paper towel soaked in a drop of grapeseed or canola oil.
- Close the lid for a minute to let the oil set.
Does this feel like a lot? It’s actually less effort than scrubbing a pan the next morning.
Deep Clean & Light Re‑Seasoning
Once every 1‑2 months (or after a particularly greasy session) give the grates a deeper clean. Heat the grill to high, let it burn off the gunk, then turn it off and let it cool. At this point, you can use a sprinkle of baking soda and a damp cloth to lift stubborn grease – ARM & HAMMER suggests this natural method for a safe, non‑chemical scrub.
After the bake‑out, wipe the grates dry and apply a thin oil coat just like you did after the first seasoning. Run the burners on high for 10‑12 minutes so the oil polymerizes again. This “light re‑season” restores the protective film without needing a full‑cycle repeat.
Seasoning Schedule Calendar
Here’s a quick calendar you can print or set a reminder for:
- Weekly: Brush, wipe with a dab of oil.
- Every 4‑6 weeks: Deep clean with baking soda, then light re‑season.
- Twice a year (spring & fall): Full seasoning cycle – clean, oil, heat 10‑15 minutes, cool, repeat once if you want extra durability.
Why the twice‑a‑year deep dive? Seasonal changes bring humidity or temperature swings that can sneak moisture into any tiny gaps. A full cycle before winter and after spring gives you a fresh shield for the next grilling season.
Expert Pro Tips
• Oil choice matters. Grapeseed (420°F smoke point) stays clear, while refined avocado (520°F) gives a slightly richer gloss.
• Thin is forever. If you can see the oil pooling, wipe it off. The polymerized layer should be almost invisible until it darkens with heat.
• Ventilation is key. Each re‑season will produce a thin veil of smoke – open a window or grill outdoors to avoid setting off alarms.
• Temperature check. Aim for 425°F; a quick hand‑test (hold your hand six inches above the grate) will feel a steady warmth after 2‑3 seconds.
• Store smart. If you’re not grilling for a month, give the grates a light oil wipe, cover the grill, and keep it in a dry spot. The thin oil film acts like a raincoat.
By following this routine, you’ll notice three things: the grates stay black, food slides off with barely a whisper, and you’ll never have to scrape stubborn rust off a blade. That’s the peace of mind every grill owner craves.
Ready to lock in that non‑stick armor for good? Grab a paper towel, a bottle of high‑smoke‑point oil, and set a calendar reminder. Your future self (and your taste buds) will thank you.
FAQ
How do I know if my grill grates are properly seasoned?
When you pull the lid off and the metal looks deep black with a faint satin sheen, you’re on the right track.
Run a clean finger lightly over the surface – you should feel a subtle slickness, not a greasy tackiness.
Cook a simple steak or a slice of bread. If it slides off with barely a whisper and leaves crisp grill marks, the seasoning has set.
And if you see any shiny puddles, that means you used too much oil – just wipe it away and give it another short heat burst.
What type of oil is best for seasoning new grill grates?
High smoke‑point oils are your friends because they polymerize without burning.
Grapeseed oil (≈420°F), refined avocado oil (≈520°F), and canola oil (≈400°F) all work beautifully.
They’re neutral‑flavored, so they won’t imprint any weird taste on your burgers.
Just remember: the higher the smoke point, the clearer the coating, and the less likely you’ll end up with a gummy mess.
And because the oil stays stable at grill temps, you won’t have to worry about flare‑ups.
Can I season my grill without taking the grates off?
Absolutely – you can do a “on‑the‑grill” seasoning if you’re short on time.
Spread a whisper‑thin coat of oil directly on the hot grates, then close the lid and run the 400‑500°F cycle.
It won’t be quite as even as a removed‑grate method, but for a quick touch‑up it works fine.
If you want the most consistent black finish, though, taking the grates off lets you coat every nook and cranny.
How often should I re‑season my grill after the initial seasoning?
After the first full cycle, treat the grates like a cast‑iron skillet – light oil after each cook keeps the film alive.
Do a “light re‑season” (wipe with oil, heat 10 minutes) every 4‑6 weeks or after a heavy deep clean.
Plan a full two‑pass seasoning in the spring and again in the fall; that pre‑ps the grill for humidity or winter storage.
Stick to this rhythm and you’ll never see rust reappear.
Is it safe to use a lot of oil to get a thicker coating?
More oil might sound like extra protection, but it actually creates a sticky, gummy layer that never fully polymerizes.
The secret is “thin is forever.” A barely visible film lets the oil soak into the metal’s pores and turn into a solid shield.
If you do end up with a shiny puddle, wipe it off with a clean paper towel and run another short heat burst – that burns off the excess.
Trust the process; a single thin coat does the job and looks cleaner.
What safety precautions should I take while seasoning?
First, always use long‑handled tongs or heat‑proof gloves – the grates will be sizzling hot.
Season outdoors or open a window; the smoke is harmless but can set off alarms.
Let the grill cool completely before you touch the metal with bare hands; the polymerized coating is fragile when hot.
And keep a fire extinguisher or a bucket of water nearby, just in case the oil smokes a bit too aggressively.
Will seasoning affect the flavor of my food?
Because you’re using neutral, high smoke‑point oils, the seasoning itself doesn’t add a noticeable taste.
What you will notice is a cleaner release, which means fewer charred bits sticking to your food and more even grill marks.
Over time the thin polymer layer actually helps lock in juices, so steaks stay juicier and veggies stay crisp.
Bottom line: seasoning improves performance without stealing the spotlight from your seasonings and sauces.
Conclusion
So you’ve walked through every step of how to season new grill grates, from a spotless surface to that deep, satin‑black finish.
Why does it matter? A thin, polymerized layer blocks rust, creates a natural non‑stick surface, and actually helps lock in juices, so your steaks pop off cleanly and your veggies stay crisp.
Remember the basics: high smoke‑point oil, a whisper‑thin coat, 400‑500°F heat for 10‑15 minutes, and a full cool‑down before you touch anything. If you see a darkened sheen, you’ve nailed it.
Got a moment of doubt? Think about the last time a grill rusted or food stuck—those frustrations disappear once the seasoning is right.
Keeping the armor alive is simple. After each cook, give the grates a quick brush, wipe with a dab of oil, and close the lid for a minute. Deep‑clean every month or two, then repeat the thin‑oil, heat, cool routine.
What’s the payoff? You’ll hear that satisfying sizzle, see perfect grill marks, and spend less time scrubbing. Your grill will stay ready season after season, and you’ll feel confident every time you fire it up.
Ready to put the knowledge into practice? Grab a paper towel, your favorite high‑smoke‑point oil, and give those new grates the protection they deserve—your future BBQs will thank you.


Leave a comment