
Perfect Pour Over Coffee Ratio: A Step‑by‑Step Guide
Ever stared at a pour‑over setup and wondered why some brews taste flat while others burst with flavor? You’re not alone—most home baristas wrestle with the perfect pour over coffee ratio before they ever get that first sip right.
Think about the last time you made a cup with a generic “2‑to‑1” rule. Maybe it was a bit weak, or perhaps the coffee tasted bitter and over‑extracted. The truth is, the ratio isn’t a one‑size‑fits‑all; it’s a living guideline that shifts with bean origin, grind size, and even the water temperature you prefer.
Here’s a quick snapshot: a light‑roasted Ethiopian might shine at a 1:15 coffee‑to‑water ratio, while a dark‑roasted Sumatra often needs a tighter 1:14 to tame its boldness. Adjusting the ratio by just one gram of coffee per 100 ml of water can swing the taste from “meh” to “wow.”
To make this easier, start by weighing both coffee and water. A digital kitchen coffee scale gives you that precision, and you can find a range of scales and pour‑over accessories online coffee brewing gear that ship fast across the US.
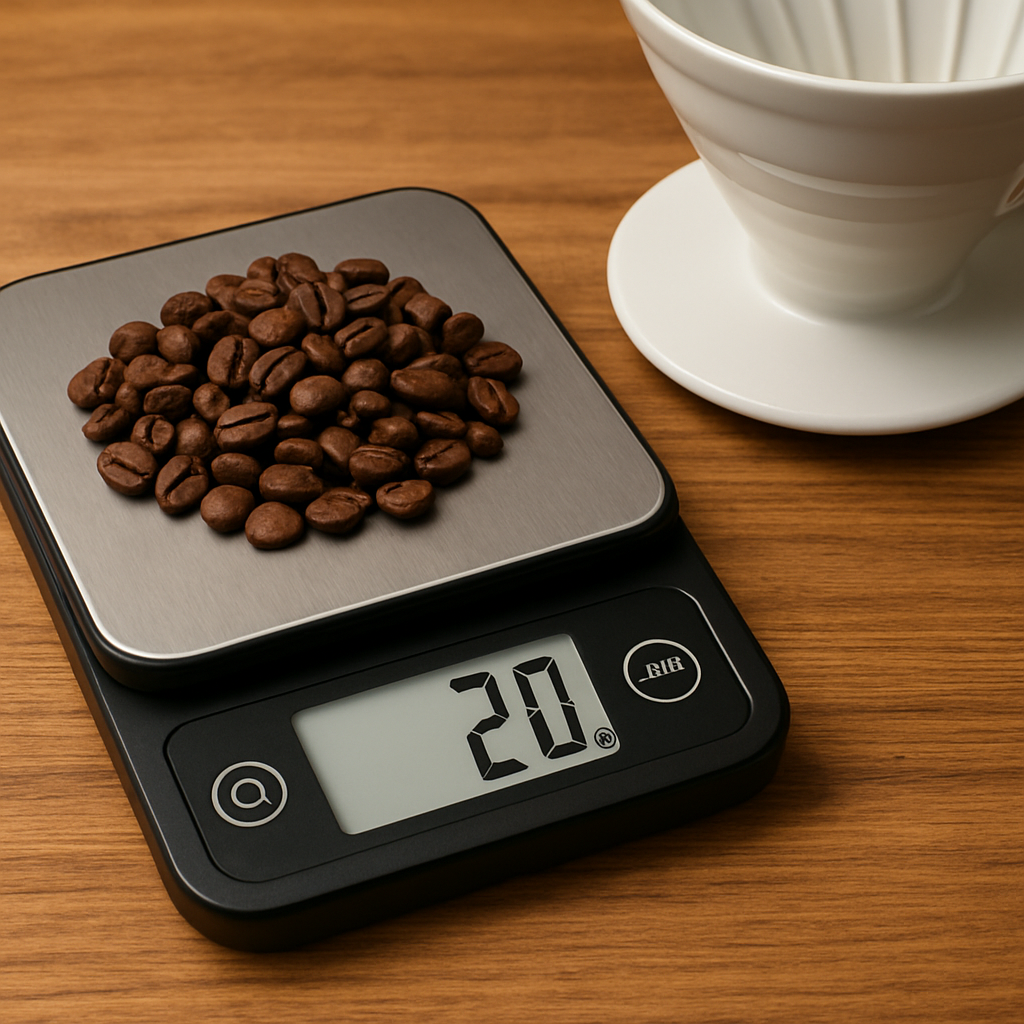
Step one: measure 20 g of coffee for a 300 ml brew, which lands you at a 1:15 ratio. Step two: heat water to about 195‑205 °F (90‑96 °C). Step three: pour slowly in a circular motion, pausing briefly after the bloom. You’ll notice a richer body and cleaner finish.
But what if you’re chasing a stronger cup? Try a 1:13 ratio—use 25 g of coffee for the same 300 ml of water. You’ll get more intensity without the harshness that comes from over‑extraction, as long as you keep the grind consistent.
So, what should you do next? Grab a scale, pick your favorite beans, and experiment with these two ratios. Jot down the flavor notes each time; you’ll start spotting patterns faster than you expect. And remember, the perfect pour over coffee ratio is a conversation between you, the beans, and the water—listen, tweak, and enjoy the journey.
TL;DR
Nailing the pour over coffee ratio lets you control flavor, with a 1:15 mix giving clarity and a 1:13 mix adding richer body without harshness.
Just weigh your beans, brew both ratios, jot tasting notes, and fine‑tune until sip feels like a dialogue between you, the beans, and the water.
Step 1: Measure the Coffee Grounds
Before you even think about pouring, you’ve got to get the coffee amount right. It sounds simple, but a tiny mis‑step here can throw the whole pour over coffee ratio off balance and leave you with a cup that’s either watery or bitter.
First, grab a digital kitchen scale. If you don’t have one yet, check out the selection of kitchen accessories that include reliable, affordable scales. Place the empty brew dripper on the scale, zero it out, and then add the beans.
Here’s the math you’ll use: for a 300 ml brew, a 1:15 ratio means 20 g of coffee; a 1:13 ratio means about 23 g. Counter Culture recommends starting somewhere between 1:14 and 1:20 depending on the roast, so you can experiment within that window.
Let’s walk through a real‑world scenario. Imagine you’re using a light‑roasted Ethiopian. You aim for a bright cup, so you pick a 1:15 ratio. Weigh out 20 g of beans, then set the timer for 0:00. While the beans sit, grind them to a medium‑fine consistency – think “sand with a few larger grains.” This grind size works well for most V60 and Kalita Wave brewers.
Now, suppose you love a darker Sumatra and want a fuller body. Switch to a 1:13 ratio: 23 g of coffee for the same 300 ml of water. You’ll notice the brew feels richer right away, but you still need to keep the grind consistent; otherwise you’ll over‑extract and end up with a harsh taste.
Pro tip: always weigh your water too. After you’ve measured the coffee, fill a kettle with the exact amount of water you need – 300 ml for the examples above. This eliminates guesswork and ensures repeatable results.
What about the “bloom”? Stumptown explains that the bloom pour should be roughly twice the weight of the coffee. So for 20 g of coffee, you’d start with about 40 ml of water, let the grounds release CO₂ for 30–45 seconds, then continue with the rest of the water.
Let’s add a checklist so you never skip a step:
- Zero the scale with the dripper in place.
- Weigh the coffee beans (20 g for 1:15, 23 g for 1:13).
- Grind immediately – burr grinder preferred.
- Weigh the water (300 ml for both examples).
- Record the numbers in a brew journal.
Why keep a journal? Because the pour over coffee ratio is a conversation. By noting the exact grams, grind size, and taste notes, you’ll spot patterns faster than you’d think. One morning you might write, “20 g, medium‑fine, bright, a hint of citrus – perfect for the Ethiopian.” The next day you can tweak just a gram or two and see how the flavor shifts.
And here’s a quick sanity check: if your brew tastes thin, you’re probably under‑dosing – add a gram or two. If it’s overly bitter, you might be over‑dosing or using water that’s too hot. Small adjustments matter.
Finally, remember that consistency is king. Use the same scale, the same kettle, and the same measuring routine each time. Once you’ve nailed the measurement, the rest of the pour‑over process becomes far more forgiving.
Ready to put this into practice? Grab your scale, weigh those beans, and start experimenting. Your perfect cup is just a few grams away.

For more detailed guidance on equipment, you can also explore the resources at Midnight Scriber, which offers unique coffee‑related gifts that pair nicely with a well‑measured brew.
Step 2: Calculate the Water Amount and Ratio
Okay, you’ve got your beans weighed. Now it’s time to turn those grams into a precise splash of water. This is where the magic of the pour over coffee ratio really shows up – a little math, a lot of taste.
Figure out the water weight
The rule of thumb is simple: multiply the coffee weight by the ratio you’ve chosen. Want a classic 1:15? Take your 20 g of coffee and multiply by 15 – that gives you 300 g (or ml) of water. If you’re feeling bold and go for a 1:13, 20 g × 13 = 260 g of water. Remember, water weight and volume are interchangeable at this temperature.
Why does it matter? A heavier water‑to‑coffee ratio (like 1:18) yields a cleaner cup, while a tighter ratio (1:13) amps up body and richness. The Specialty Coffee Association even recommends a 1:17‑1:18 “Golden Cup” as a neutral starting point according to the Coffee Bros guide on brew ratios. From there, you can tweak up or down based on roast and personal preference.
Convert to a brew‑friendly volume
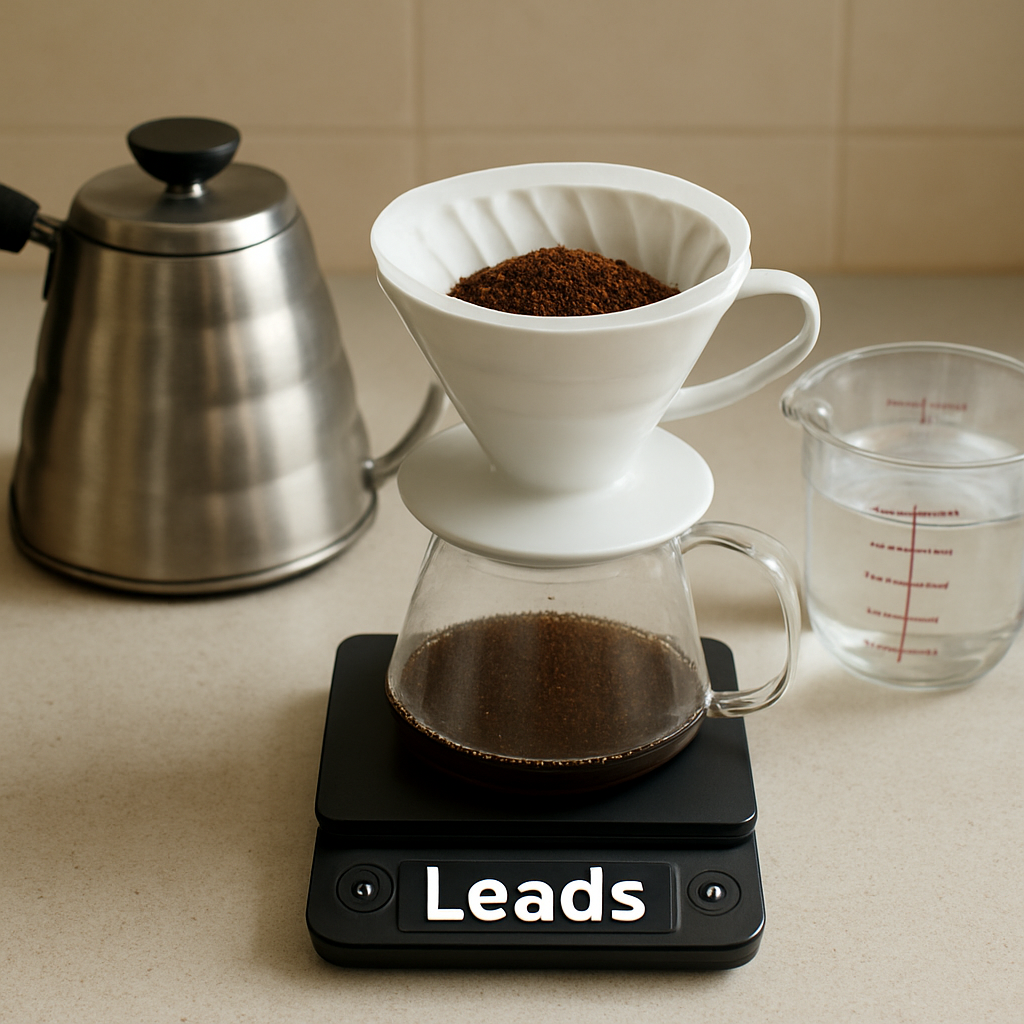
Most kettles have a graduated wall, but it’s easier to think in milliliters. If you need 300 ml, fill your gooseneck kettle to the 300 ml line, then pause for the bloom. The bloom itself is usually about twice the coffee weight – so for 20 g of coffee, start with roughly 40 ml, wait 30‑45 seconds, then continue pouring the rest.
Pro tip: pre‑heat your dripper and mug with hot water. It keeps the brew temperature steady, which is especially important when you’re dialing in a tighter ratio.
Quick reference table
| Desired Strength | Ratio (coffee:water) | Water for 20 g coffee |
|---|---|---|
| Mild/clean | 1:18 | 360 ml |
| Balanced | 1:15 | 300 ml |
| Robust/rich | 1:13 | 260 ml |
Grab a pen and jot these numbers down in your brew journal. Seeing the exact water volume next to the ratio helps you repeat the same cup later, or spot where a tweak went wrong.
And here’s a little mental check: if the coffee tastes thin, you probably under‑dosed the beans or used too much water – bump the coffee up a gram or cut the water a splash. If it’s bitter, you might have over‑extracted – either lower the ratio or shorten the brew time.
Now, imagine you’re setting your pour‑over station on a beautiful Rustic Farmhouse Lift-Top Coffee Table. It’s the perfect spot to line up your scale, kettle, and timer, making the whole process feel like a ritual rather than a math problem.
Watch the short video above for a visual walkthrough of measuring water for a 1:15 ratio. Seeing the pour in action can clear up any lingering confusion about timing and flow.
Once the water is measured, you’re ready to move on to the actual pour. Keep your notes handy, stay curious, and remember that each cup is a conversation – you, the beans, and the water all have something to say.
Step 3: Bloom and Pour Technique
Alright, the coffee’s weighed, the water’s measured – now it’s time for the part that makes the magic happen: the bloom and pour. If you’ve ever watched a barista pause after the first splash, you know it’s not just for show. That little waiting period is where the coffee releases carbon dioxide, and it sets the stage for an even extraction.
Start by gently pouring twice the weight of your coffee grounds in hot water. So if you’ve got 20 g of beans, aim for about 40 ml of water. Make sure the water is around 195‑205°F; anything hotter will scorch the grounds, and anything cooler will leave you with a weak cup.
Why the bloom matters
The bloom is like a warm‑up stretch before a workout. The CO₂ bubbles rise, creating tiny channels that let the rest of the water flow more uniformly. Skipping it or rushing through means some grounds stay dry while others get oversaturated – and that’s when you end up with a cup that tastes “off.”According to coffee experts, pouring too fast can kill flavor, so give those grounds a moment to breathe.
Let the bloom sit for 30‑45 seconds. You’ll see the bed puff up, a frothy little cloud forming on the surface. That’s a good sign. While you wait, you can double‑check your timer, wipe the rim of your dripper, or just enjoy the aroma rising.
Controlled steady pour
When the bloom’s done, begin the main pour. The key is a slow, steady, circular motion from the center outward, then back to the center. Think of it like painting a smooth circle on a canvas – no jerky strokes. A gentle flow keeps the water level rising evenly, which means each coffee particle gets the same amount of exposure.
Here’s a simple rhythm: pour for about 10‑12 seconds, pause for 5 seconds, then repeat until you’ve delivered the remaining water. If you’re using a 300 ml brew, you’ll end up with roughly three to four mini‑pours. This pacing helps prevent turbulence, which can cause channeling – those nasty streams that skip over parts of the coffee bed.
One trick I love is to set a small “pour marker” on the side of the kettle. When the water level reaches that line, it’s time to pause. It takes the guesswork out of the process and keeps you consistent batch after batch.
Adjusting for grind size
If you’re using a finer grind, slow the pour a notch. Finer particles create more resistance, so a slower flow avoids over‑extraction and bitterness. Coarser grinds can handle a slightly quicker pour, but never so fast that the water just splashes over the top.
Remember, the goal is balance: not too fast to drown the coffee in bitterness, not too slow to leave it watery. It’s a dance, not a sprint.
When you’ve finished the final pour, give the dripper a gentle shake to level the bed, then let the coffee finish dripping. The total brew time should sit around 2:30‑3:00 minutes for most V60 setups.
Now, take a sip. If the flavor feels bright, clean, and a touch sweet, you’ve nailed the bloom and pour. If it’s thin, add a gram of coffee next time; if it’s bitter, shorten the brew or lower the water temperature.
Want to make this whole ritual feel even more special? Check out a sleek surface like a Modern High Gloss Coffee Table with RGB LED lighting – the perfect backdrop for your pour‑over ceremony.
Quick checklist before you clean up:
- Bloom: 2× coffee weight, 30‑45 sec.
- Pour: steady, circular, 10‑12 sec bursts.
- Adjust flow for grind size.
- Total brew time 2:30‑3:00 min.
- Record ratios, times, and taste notes.
Keep this routine in your brew journal, experiment with tiny tweaks, and you’ll watch your pour‑over coffee ratio finally start to sing.
Step 4: Fine‑Tune and Troubleshoot
Alright, you’ve landed a decent cup, but maybe something still feels off. That’s where the fine‑tuning dance begins – a little data, a lot of tasting, and a few deliberate tweaks.
Spot the symptoms first
Take a sip and ask yourself: is it sour, bitter, watery, or just… flat? Each flavor clue points to a specific variable in the pour over coffee ratio equation.
• Sour or grassy → likely under‑extracted. Extraction yield under 18 % usually means the water didn’t pull enough soluble compounds.
• Bitter, dry, or hollow → probably over‑extracted. That’s the sweet spot where the yield climbs past 22 % and the harsher compounds dominate.
• Thin or watery → you may have used too much water for the coffee dose, or the grind is too coarse.
Does any of that sound familiar?
Adjust the ratio, not the hype
If your cup is sour, try nudging the ratio toward a tighter brew. For a 300 ml batch, move from 1:16 (≈19 g coffee) to 1:15 (≈20 g). That extra gram gives the water a little more coffee to dissolve, boosting extraction without changing anything else.
Conversely, if bitterness is the culprit, loosen the ratio a notch. Dropping from 1:14 to 1:16 can dial the TDS down and give the acidic notes room to shine. Stone Creek’s guide suggests a 16:1 baseline as a balanced starting point, and you can swing a gram or two around that hub to find your sweet spot to find your sweet spot.
Remember, the ratio is just the map – the terrain (grind, temperature, pour speed) still matters.
Grind size is the secret lever
When you tighten the ratio but the brew still tastes sharp, your grind is probably too coarse. Finer particles slow the flow, letting water linger longer and extract more. Try moving the grinder setting down one click and watch the brew time creep up by 10–15 seconds.
If you go the other way and the cup feels syrupy, coarsen the grind just a notch. A faster flow prevents the water from staying too long, keeping the extraction yield in that happy 18‑22 % window.
Temperature check
Water that’s too hot (above 205 °F) can scorch the grounds, pushing the extraction yield over the edge. Too cool (under 190 °F) will leave flavors under‑developed. A quick thermometer read or a simple “boil, then wait 30 seconds” routine keeps you in the 195‑205 °F sweet zone.
Channeling and pour technique
Even with perfect numbers, an uneven pour can create channels—those skinny rivers where water rushes through and leaves dry patches. The fix? Pour slowly in concentric circles, pause briefly after each 50‑ml splash, and keep the water level just above the coffee bed. A gentle swirl after the bloom can also level the grounds.
Does your dripper look like a miniature waterfall or a chaotic splash? If it’s the latter, slow down and watch the flow.
Real‑world troubleshooting checklist
- Note the taste: sour, bitter, thin, or balanced.
- Record current ratio (grams coffee / ml water).
- Adjust one variable at a time: ratio → grind → temperature → pour speed.
- Keep brew time between 2:30 and 3:00 min for a V60.
- Log the change and sip again.
It may feel a bit like a science experiment, but the goal is simple: each tweak should move the cup a step closer to “yeah, that’s exactly what I wanted.”
Pro tip: the “single‑gram rule”
When you’re stuck, change the coffee dose by just one gram. That tiny shift often reveals whether the ratio or the grind is the real issue, without throwing the whole brew apart.
And if you ever wonder whether you’ve gone too far, remember the “Golden Cup” benchmark: a balanced extraction yield (18‑22 %) and a TDS around 1.25 %. You don’t need a lab to hit it; you just need to listen to your palate and iterate.
So, what should you do next? Grab your scale, tweak that one gram, and write down the result. The next sip will tell you if you’ve cracked the code.
FAQ
What is the “perfect” pour over coffee ratio for someone just starting out?
Most beginners find a 1:15 coffee‑to‑water ratio a comfortable middle ground. That means 20 g of coffee for every 300 ml (10 oz) of water. It gives enough body to notice flavor without being overwhelming, and it’s easy to remember when you’re still getting the hang of grind size and bloom timing. If the cup feels thin, add a gram; if it’s bitter, shave a gram off.
How does tweaking the pour over coffee ratio change the taste of my brew?
When you tighten the ratio (for example, moving from 1:15 to 1:13), you’re increasing coffee concentration, so the cup usually feels richer, heavier, and more caramel‑sweet. Loosening it to 1:18 dilutes the brew, highlighting bright acidity and giving a cleaner mouthfeel. Think of the ratio as a volume knob for strength – each gram or milliliter shift nudges the balance between sour, sweet, and bitter.
Should I use a different ratio for light‑roasted beans versus dark‑roasted beans?
Yes, roast level plays a big role. Light roasts often shine at a slightly higher ratio like 1:16 or 1:15 because they need more water to extract their delicate floral notes. Dark roasts, which are already dense and oily, usually benefit from a tighter ratio such as 1:13 or 1:14 to tame bitterness and bring out chocolatey depth. Start with the baseline, then fine‑tune a gram or two based on what you taste.
Do I really need to be exact with the pour over coffee ratio, or is “close enough” fine?
Precision matters more than you might think, especially if you’re chasing consistency day after day. A 2‑gram difference in a 20‑gram dose can swing the extraction by a few percentage points, which you’ll taste as either thin or overly bitter. Using a digital scale and measuring water by weight removes guesswork and lets you replicate the same cup every morning.
What tools make measuring the pour over coffee ratio easiest?
A good digital kitchen scale is the single most valuable piece of gear – it gives you gram‑level accuracy for both coffee and water. Pair it with a gooseneck kettle that lets you control flow, and you’ve got a simple, repeatable system. If you like visual cues, a brew timer helps you keep the bloom and total brew time in the 2:30‑3:00 minute sweet spot.
How often should I revisit my pour over coffee ratio?
Treat the ratio as a living recipe. Whenever you switch beans, change roast level, or notice the cup tasting off, take a moment to log the current ratio and experiment with a one‑gram adjustment. Seasonal water hardness changes can also affect extraction, so a quick check every few weeks keeps your brew on point without turning coffee into a full‑time science lab.
What’s a quick troubleshooting checklist if my pour over coffee ratio seems off?
First, note the dominant flavor flaw – sour, bitter, or watery. Then verify you measured both coffee and water correctly. If it’s sour, tighten the ratio or grind a touch finer. If it’s bitter, loosen the ratio or coarsen the grind. Finally, double‑check water temperature (195‑205 °F) and pour speed. Adjust one variable at a time, brew again, and you’ll usually land on a balanced cup within two tries.
Conclusion
So there you have it—your pour over coffee ratio is less a strict formula and more a friendly conversation with the beans, water, and your own taste buds.
When you weigh the coffee, dial in the water, watch the bloom, and tweak one gram at a time, you’ll start to hear that sweet spot sing every morning.
Remember the core ideas: start with a solid baseline (1:15 is a great middle ground), log each brew, and adjust the ratio, grind, or temperature one variable at a time.
If a cup feels sour, tighten the ratio or grind finer; if it’s bitter, loosen it or coarsen the grind. A quick temperature check (195‑205 °F) and a steady pour keep the extraction in the happy 18‑22 % range.
The beauty of this process is that you don’t need a lab—just a digital scale, a gooseneck kettle, and a notebook. Over a few weeks you’ll have a personalized cheat sheet that works for any roast you love.
So what’s the next step? Grab your scale, brew a cup using the 1:15 ratio, note the flavor, and then experiment with a single‑gram shift. Let that tiny change guide you toward the perfect sip.
Enjoy the ritual, trust your palate, and keep the conversation going. Happy brewing!


Leave a comment